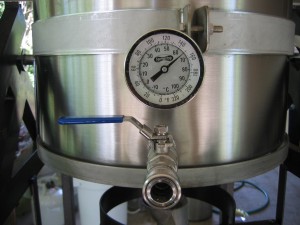
 Starting this week, I’ll post a series of articles walking readers through an all-grain brew day. Hopefully this will give beginning all-grain brewers — especially those who don’t have access to a homebrew club or a friend who brews — a guide to their first all-grain brew day. For intermediate all-grain brewers, it will hopefully provide a list of options to explore. I’ll focus mostly on the process itself, only mentioning theory when it explains the motivation for a step or provides some interesting information that is not well-known.
Preparing the Strike Water
Before mashing in, you’ll need to crush your grains and prepare your strike water. Your strike water is the portion of your brewing liquor that is used for mashing in. “Brewing liquor” is another term for the treated water used in brewing. If you start by preparing and heating your strike water, you can crush your grains while it is heating.
Any water source that is safe (not contaminated) and tastes good can be used for brewing. Almost any municipal water source should be fine. You can brew with untreated water, but a two simple treatments will improve your strike water immensely.
Removing Chloramines
First, your strike water should either be carbon filtered or treated with metabisulfite to rid it of chloramines. Chloramines are chlorine compounds added to municipal water sources for sanitation. If they make it into your beer, off flavors can result. If you go the metabisulfite route, one Camden tablet (which contains potassium metabisulfite) will treat up to 20 gallons (~80 L) of brewing liquor. Just crush the tablet and stir it into your water. The chloramine-destroying reaction will occur in less than a second. The metabisulfite from Camden tablets gives off sulfur dioxide (SO2) gas, which smells like rotting eggs. For this reason, some brewers like to add the Camden tablet the night before and let the water sit overnight to let the gas dissipate. Others don’t bother, reasoning that — at one tablet per 20 gallons (38 L) — the sulfur dioxide concentration is so low that it’s not problematic. Also, sulfur dioxide is volatile and any SO2 that doesn’t react with chlorine will simply be driven off during the boil.
Calcium Content
The second thing you should do is ensure that your water has enough calcium in it. Sufficient calcium in your brewing liquor has a number of benefits, including stabilizing alpha amylase (an important starch-degrading enzyme in the mash), limiting the extraction of silicates and some astringent compounds from malt, improving the ease of lautering, improving the precipitation of the hot break, and contributing to less color pickup during the boil. It also helps precipitate oxalate ions (C2O4-2) by forming calcium oxalate, the same solid that causes kidney stones in humans. Excess oxalate in beer leads to haze and can cause gushing.
A calcium ion concentration of at least 100 ppm is sufficient to get all these benefits (although some beers are brewed with less calcium than this). If you get your water from a municipal source, you can ask them for an analysis of your water. If your water had no calcium in it initially, adding 0.50 oz. (14 g) of calcium chloride (CaCl2*2H2O) or 0.60 oz. (17 g) of gypsum (CaSO4*2H2O) to 10 gallons (38 L) will get you there.
Other Mineral Adjustments
Advanced all-grain homebrewers may additionally want to adjust the mineral content of their brewing liquor to get their mash pH to fall in the optimal range. Additionally, they may want to alter the concentration of certain ions to enhance influence how some beer flavors are perceived. Specifically, in a hoppy beer, they may want to add enough gypsum (calcium sulfate) to boost the sulfate ion concentration into a range that it accentuates hop bitterness. These topics are beyond the scope of this article, but some aspects are addressed here and here.
Making the Changes
If you can treat your full volume of brewing liquor for chloramines — and make any mineral additions, acid additions, or dilutions with distilled water at the same time — doing so will save you time. If not, you can prepare only your strike water at first, then treat your sparge water during the mash. Once you have at least your strike water prepared, begin heating it. You can wait until you are mashed in to start heating your sparge water. Finally, before the water gets hot, dip a clean glass in it and taste it to ensure that your adjustments did not negatively alter it’s flavor. Before proceeding, record the details of your water treatment in your brewing notebook or brewing software.
Next up, milling the grains.
I will post an article in this series every other day until it is complete.
—
Related articles
Water Treatment for Extract Brewers

Can insufficient calcium content in the brewing liquor result in a wort that has to many proteins and dextrins to attenuate fully?