Extend Your Session Beer Volume

If you read my recent article on sparging session beers, you’ll know that fully sparging the grain bed for a low-gravity session beer can yield less volume than a typical pre-boil wort target. For a 5.0-gallon (19-L) batch of session beer, you’ll collect less than 6.0 gallons (23 L) of wort and perhaps even less than 5.0 gallons (19 L). The simplest way to deal with this is to add water to your wort to yield a volume you can boil for 60 to 90 minutes. Another way to deal with it would be to boil the smaller volume for your desired boil time, then add cool water to the post-boil wort in the kettle. This way saves you a little time when chilling the wort. 

That baby cracks me up

However, there is a third possibility — one that will yield more beer with the same amount of effort and using your same equipment (except perhaps for a second fermenter). The third possibility is to select an amount of grain that will yield either 6.0 gallons (23 L) or 6.5 gallons (25 L) of wort from a fully-sparged grain bed. This is 9.25 lb. (4.2 kg) and 10.0 lb. (4.5 kg), respectively. This will allow you to perform a 60-minute boil or a 90-minute boil, whichever you prefer. In either case, your pre-boil wort should have a specific gravity (SG) around 1.043. After a 60-minute boil of the 6.0 gallons (23 L), your original gravity (OG) should be close to 1.051. For a 90-minute boil of the 6.5 gallons (25 L), 1.056. Then, dilute this wort in your fermenter to your target original gravity. (In practice, your numbers may vary slightly from these. If you try this, take good notes on your grain weight, your wort yield, and the density of your  pre-boil and post-boil wort. With that information, you can tweak your process, if needed, the next time you brew.)

Dilution tables for 5.0 gallons (19 L) of session beer. Click to expand.

The two tables above show you how much dilution water you need to hit a variety of original gravities in the session beer range. As an example, let’s say you wanted to brew an ordinary bitter at an OG of 1.036. Furthermore, you wanted to start with 9.25 lb. (4.2 kg) of grain and boil for 60 minutes. On the appropriate table, find the OG of 1.036. Look to the left of that number to see you’ll have to add 2.0 gallons (7.8 L) of water to the 5.0 gallons of post-boil wort for a yield of 7.0 gallons (26 L) at SG 1.036. Once you know this, formulate a recipe for 7.0 gallons (26 L) of bitter, but brew it as a 5.0-gallon (19-L batch). After the boil, chill the wort and dilute it to your target strength in your fermenter (or fermenters). 

Using this method, you can make more than 5.0 gallons (19 L) of beer with the almost the same amount of effort as brewing a 5.0-gallon (19-L) batch. And you won’t need a larger mash tun or kettle. All you’ll need is more fermenter space. Since session beers are meant to be “the one to have when you’re having more than one,” it can be good to brew a little extra. 


Don’t Overpitch a Session Beer

[This is the second article in a series on brewing session beers. In the first, I discusssed sparging the grain bed for a low-gravity beer.]

In the past, a common problem among homebrewers was pitching an inadequte amount of yeast. The original containers of liquid yeast did not contain enough yeast cells to yield an ordered fermentation of 5.0 gallons (19 L) of average strength or higher wort. They “would work,” but start times were longer than they should have been and sometimes the beer did not attenuate fully. However, some brewers did not want to go through the hassle of making a yeast starter. 

These days, homebrewers have access to liquid yeast packs that have 100 billion cells or 200 billion cells. And of course, we’ve always had access to dried yeast packets that have a large cell count. An 11.5-gram packet of dried yeast, for example, contains over 200 billion cells. And all that is great —  except when you are brewing a session beer. For a low-gravity beer, the amount of cells in a commercial yeast packet might actually be too high.

Generally, the problems associated with overpitching are less troublesome than the problems associated with underpitching. However, in a session beer, overpitching can detract from the beer’s character. Overpitched beers may attenuate to a greater degree than you want. With a session beer, you already expect a low finishing gravity because of the low starting gravity. So “extra” attenuation is unwelcome. You can moderate this somewhat by adding more crystal or caramel type malts to your recipe or mashing for a shorter time at a higher temperature. However, higher pitching rates also increase your overall attentuation. 

In addition, the yeast character from ale strains is mostly developed in the early growth phase of the beer fermentation. Fewer esters are produced once the yeast has reached their maximum density and are fermenting compared to when the population is still growing. So, overpitching can minimize the yeast character of a session beer. And given that many session beers are low-gravity, English-style ales, this character will be missed. Even in a non-English-style beer, some yeast character in a low-gravity beer gives it more overall aroma and flavor — something that can be lacking if the beer is not brewed well.  

For a low-gravity ale, I recommend pitching even less than the typical ale calls for. The general rule of thumb for ales is to pitch a million cells per mL per °Plato. So, for example, 5.0 gallons (19 L) of 12 °Plato (SG 1.048) beer — one that should produce a beer around 5.0% ABV — would need 227 million yeast cells. However, 5.0 gallons of a 9 °Plato (SG 1.036) beer — one that should produce a 3.5% beer — only needs 170 million cells. Pitching 200 million cells to a beer like this would not be drastically overpitching, and you’d probably get away with it. However, if you wanted to purposely underpitch to develop more yeast character, 130 million cells would be a better target. That’s 75% or the amount the general rule would suggest (and in line with the pitching rate of many commercially produced ales). 

Fortunately, it is easier to deal with having too much yeast than too little. If you have a 200 billion yeast cell container of yeast, and you want your pitching rate to be less than that, just pitch part of the package. If you wanted 130 million cells, for example, you want to pitch (130 million cells/200 million cells =) 0.65 or 65% of the yeast in a 200 billion cell package. Be sure to shake the package so that the yeast is evenly distributed before dividing it. You could perhaps utilize the unused yeast to make bread, or another yeast starter, if you were concerned about wasting it.

Alternatively, you can use a yeast pitching calculator to determine the size yeast starter that would be required. Then, pitch a small amount of yeast to the starter — NOT the whole pack — and let that grow. Recall that 8.0 fluid ounces (240 mL) of yeast slurry is generally adequate for 5.0 gallons (19 L) of 12 °Plato (SG 1.048) beer. So, if you were making a 1.0 qt. (~1 L) yeast starter, about 1/20 of that volume — 0.4 fluid ounces (12 mL) of yeast slurry would be required. I nearly always make a yeast starter because I can assess the health of the yeast based on the vigor with which they ferment the starter wort.

Brewing a high-quality low-gravity session beer requires every bit as much attention as brewing a big beer. The “tricks” are just different. For starters, don’t use too much sparge water on your grain bed nor pitch too much yeast to your wort. More session beer posts are in the works.

Don’t Oversparge When Brewing a Session Beer

Session beers are low-alcohol beers that allow the drinker to consume a few without becoming too intoxicated. In order to be of high quality, the brewer must pay just as much attention to brewing a session beer as he would to brewing any normal or high-gravity beer. In the next week, I am going to post a few articles with tips on how to make the best session beers. Today’s entry concerns how much wort to collect from the mash.

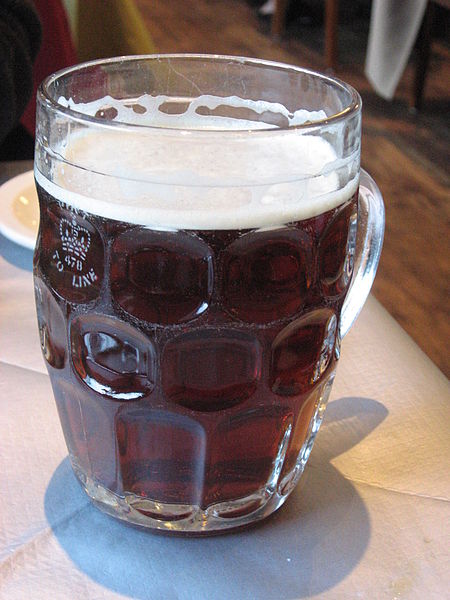
A session of beers at the pub can lead to stimulating conversation and a wonderful time.

A fully-sparged grain bed has been rinsed of all the sugars the brewer can obtain without extracting excess tannins and silicates. On my homebrew system, using my methods, I can yield around 0.65 gallons per pound of grain (5.3 L/kg). If I collect a volume short of that, I have left fermentable carbohydrates behind. If I collect more than that, and I risk astringency. This has some implications when brewing a low-gravity session beer. 

Below a certain original gravity (OG), a fully-sparged grain bed will yield a volume of wort less than can be boiled for 60 minutes and still yield 5.0 gallon (19 L). In fact, below a certain OG, a fully-sparged grain bed will yield a volume of wort smaller than your batch size. When this happens, the brewer will need to add water to make up his or her full-pre-boil wort volume. 

Below is a chart that shows beers with target OGs in the session beer range, how much pale malt would be required to hit that target (assuming 75% extract efficiency), and the volume of wort the brewer should collect. Use the chart as a guideline, but also measure the pH and specific gravity of your final runnings if you fly sparge. You can also simply taste the runnins to see if astringency is beginning to show. Once your grain bed is fully sparged, simply add water to hit your desired pre-boil volume. It’s that simple. 

Octoberfest Season

Octoberfest beers are my favorite seasonal beer and I love Octoberfest season. In the US, Octoberfest beers begin appearing on the shelves in early September and remain available at least into early November. The actual German festival begins in mid-September, runs for two weeks, and ends on the first Sunday in October. German Octoberfest beers imported into the US are often of the Octoberfest Märzen type — malty, orangish-colored lagers around 5.5–6.0% ABV. However, you can also find imported Octoberfest beers in the ligher-colored festbier style. (Also note that German Octoberfests are almost always spelled with a “k” — Oktoberfest or Oktoberfestbier. Some US breweries also do this.) Of the German imports, Hacker-Pschorr — among the darkest and richest — is my favorite. However, as might be expected, there are plenty of German imports that are great and my preference is just a matter of opinion. Somewhat recently, US breweries have begun producing some spectacular Octoberfest lagers. These well-balanced beers taste great on a crisp fall evening. 

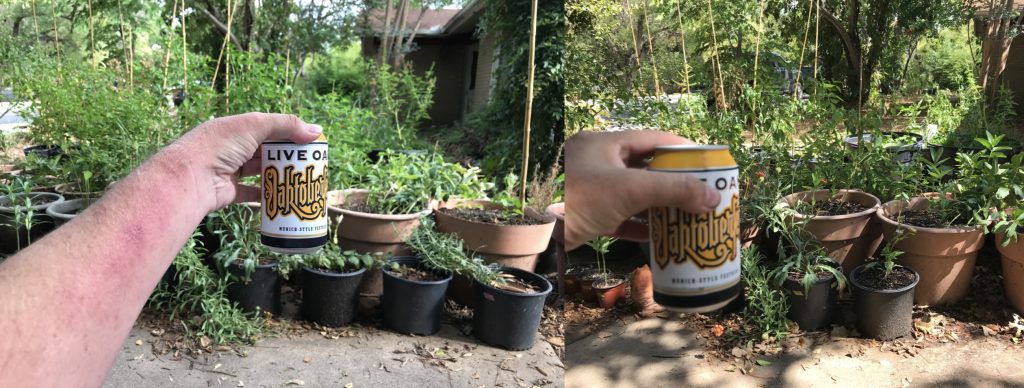
It’s not a tent in Munich, but I like my beer garden. Despite the name, Live Oak’s Oaktoberfest does not have any oak character. My arm has some poison oak character in this photo, unfortunately.

The best Octoberfest beers are malty, without any caramel or biscuit notes — just a smooth maltiness that mostly comes from Munich malt. (10 °L). The malty character may be accentuated by dark Munich malt (20 °L), melanoidin, or aromatic malt. Also, some Vienna malt (6 °L) — which is intermediate in kilning between Pilsner malt (2 °L or lower) and the Munich malts — may be present. However, a fantastic Octoberfest can brewed from a grist if 100% Munich malt. Neutral hops — noble hops in the case of actual German beers — provide just enough bitterness to make a well-balanced beer. The beer is not sweet, but it isn’t dry either. It has just enough body to feel a little more filling than a Pilsner, but not by much. Festbier types, brewed with mostly Pils malt, are generally a bit drier. The level of carbonation is within the usual range of lager beers. Overall, the Märzen style of Octoberfest is a malty lager beer with a bit more color and “heft” than a Pilsner, and with less hop bitterness. 

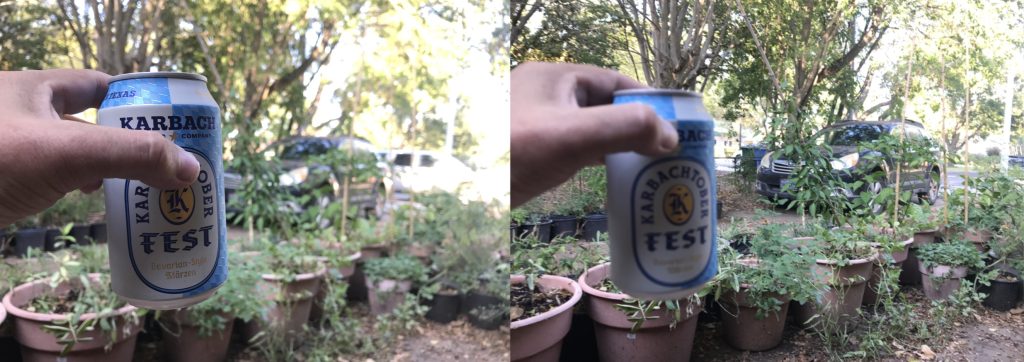
Another great local — or at least regional — Octoberfest lager.

US craft brewers have came a long way when it comes to producing Octoberfest beers. In the late 1980s through the early 2000s, most US “Octoberfests” were amber colored ales made with crystal malt in the grist and often showing a strong biscuit malt character. Sadly, some breweries still produce this type of beer. Many of these were also over-hopped, based on the target style. The best US breweries, however, started making lager beers that aligned with the traditional Octoberfest Märzen style and now there are many great examples. I live in Texas and the regional breweries Live Oak, Karbach, and Real Ale all make excellent interpretations of the style. (For what it’s worth, Real Ale was never a real ale brewery in the sense of brewing cask conditioned ales. They make both ales and lagers, including Hans Pils — which is one of my “go to” beers.) From discussions on social media, many homebrewers report local and regional breweries near them producing fine examples. 

For me, Octoberfests are an “indicator beer.” If a brewery or homebrewer can produce a nice Octoberfest, I have some confidence that the rest of their beers are decent. If you are brewing an Octoberfest, here is my advice. First, be fanatical about cleaning and sanitation. Even a hint of contamination — below the level that noticable off flavors are produced — can rob a malty beer of its malt flavor and aroma. Secondly, run an orderly fermentation — pitch enough yeast, aerate adequately, and hold the fermentation temperture in the proper range. Thirdly, if you are brewing an Octoberfest on the darker end of the scale, adjust your water chemistry. Make your water with just slightly more bicarbonate than the color would indicate is optimum. Not enough to throw your pH out of whack, just a bit. If you calculate residual alkalinity (RA), shoot for 1.3–1.4 for a beer that’s 13–15 SRM. Add calcium chloride such that you have 100–150 ppm calcium ions. Taste your treated water to ensure that it tastes good  — and of course eliminate any chlorine compounds through carbon filtration or with Campden tablets first. And finally, use  fresh, high-quality Munich malt.

With Octoberfest season winding down, winter warmers are up next. Prost!

Partial Mashing Positives

Like most homebrewers, I started out using the standard “malt extract with steeping grains” method of homebrewing. I can remember making a “pale ale” with two cans of liquid malt extract, a pound of crystal malt, and 2 oz. (60 g) of Cascade hops.

Later, I switched to all-grain brewing and was a bit of a purist for many years, only brewing all-grain batches. After all, my beers got markedly better when I switched to all-grain, why go back to an inferior method? Years later, I realized that it wasn’t the switch to all-grain that made better beers, it was all the other things I started doing at that same time. For example, I started making yeast starters. I started to evaluate my brewing ingredients and not brewing with stale malt or cheesy hops. And I started learning more about the science of brewing. [Read more…]

Tart Fruity 100% Rye Session Ale

100% Rye and Fruit make for a tasty tart beer.

Along with brewing moderate and higher gravity beers, I’m in search of interesting, drinkable, very low gravity beers to help with cutting calories (and preserving sobriety) while satisfying my beer thirst. Brewing with 100% rye has been one technique I’ve found to give me low alcohol and substantial body. A few months ago, I decided to combine this all-rye approach with wort souring and the addition of fruit.

Process

Let’s begin at the beginning. To six gallons (23 L) of filtered water, I added 5.0 pounds (2.3 kg) crushed malted rye. Using Brew in a Bag, I rested this thin mash at 150˚F (65˚C) for an hour. After removing the grain, I brought the wort up to 180˚F (82˚C) for fifteen minutes to pasteurize. I didn’t want any of the microorganisms on the grain to have any effect on my souring process. [Read more…]

Managing Tannins as a Beer Character (Part II of II)

375px-Tannic_acid.svgAs mentioned in the first part of this article, there are a few beers that might benefit from just a hint of astringency. Usually, the slight puckering sensation will offset or complement another character in the beer. (And, of course, we all know that noticeable astringency in most beers is going to be unwanted.) There are a couple ways you can get just a hint of astringency in your beer, if you want it.

Tannins are water soluble. They are more soluble in high pH solutions than low. And, like most water soluble molecules, they are more soluble in hot water than cold. Let’s first review what happens when you use continuous sparging with 170 °F (77 °C) water. In other words, if you sparge in the normal way meant to minimize tannin extraction. [Read more…]

Managing Tannins as a Beer Character (Part I of II)

375px-Tannic_acid.svg

Tannic acid, the molecule that gives its name to the class of polyphenols called tannins.

Tannins are a class of molecules found in plants. At high doses, tannins are unpalatable to animals (including humans) and are most highly concentrated in the parts of plants that need the most protection. Some types of tannins are found in barley seed, and hence are present in malt. Other tannins are found in hops. A small amount of tannins are extracted in the mash and in the boil. Some react with proteins and drop out of the brewing stream, but some do carry over into finished beer — and brewing scientists have found that a beer completely devoid of tannins does not taste right. However, as all brewers know, an excess of tannins leads to a harsh astringency that is unpleasant. So, most brewers strive to minimize the amount of tannins extracted in their beers. [Read more…]

Fruit IPAs (II: How to Brew a Fruit IPA)

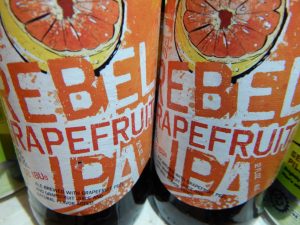
DSCN3793Brewing a fruit IPA is no more difficult than brewing any fruit beer. The most popular fruit IPAs use fruits that either accentuate the citrus character of their hops (grapefruit IPA, blood orange IPA) or the tropical character in hops (mango IPA, pineapple IPA). See below for a list of hops with these characters. The best examples of fruit IPAs have enough fruit character that you can tell it’s not an ordinary IPA, but not so much that the underlying beer is totally obscured. As such, you really don’t need to alter your IPA recipe to accommodate the fruit — just decide how intense you want the fruit flavor and add that to the recipe. [Read more…]

Thoughts on Cleaning and Sanitation (I: Airborne Contamination) 

IMG_2961

Wort being chilled with an immersion chiller. The kettle is covered loosely with a lid. Steam from the boil sanitized the lid. I also drape clean T-shirts over the kettle while chilling to prevent airborne microorganisms moving vertically through the crack in the kettle lid.

Recently, I posted an article advocating that brewers think about cleaning and sanitation as a matter of degree rather than a “good enough”/“not good enough” dichoctomy. In this article, I’ll share some ideas to move your cleaning and sanitation practices from “good enough” to just a bit better than that. For the sake of completeness, I’ll cover some familiar ground, but I think there are a couple ideas in here that are not well appreciated in the homebrewing community.  [Read more…]