Archives for November 2022

Garlic Experiment

One question many gardeners have is whether you can plant supermarket garlic and have it grow successfully. If you search the web for the answer, you get both yes and no. Some people say, “Sure, just stick it in the ground and it will grow.” And this is tempting since seed garlic is expensive compared to supermarket garlic. Others — and especially those selling seed garlic — will say that supermarket garlic may be treated with growth inhibitors or that it may bring disease to your garden. I decided to conduct an experiment to compare the two. 

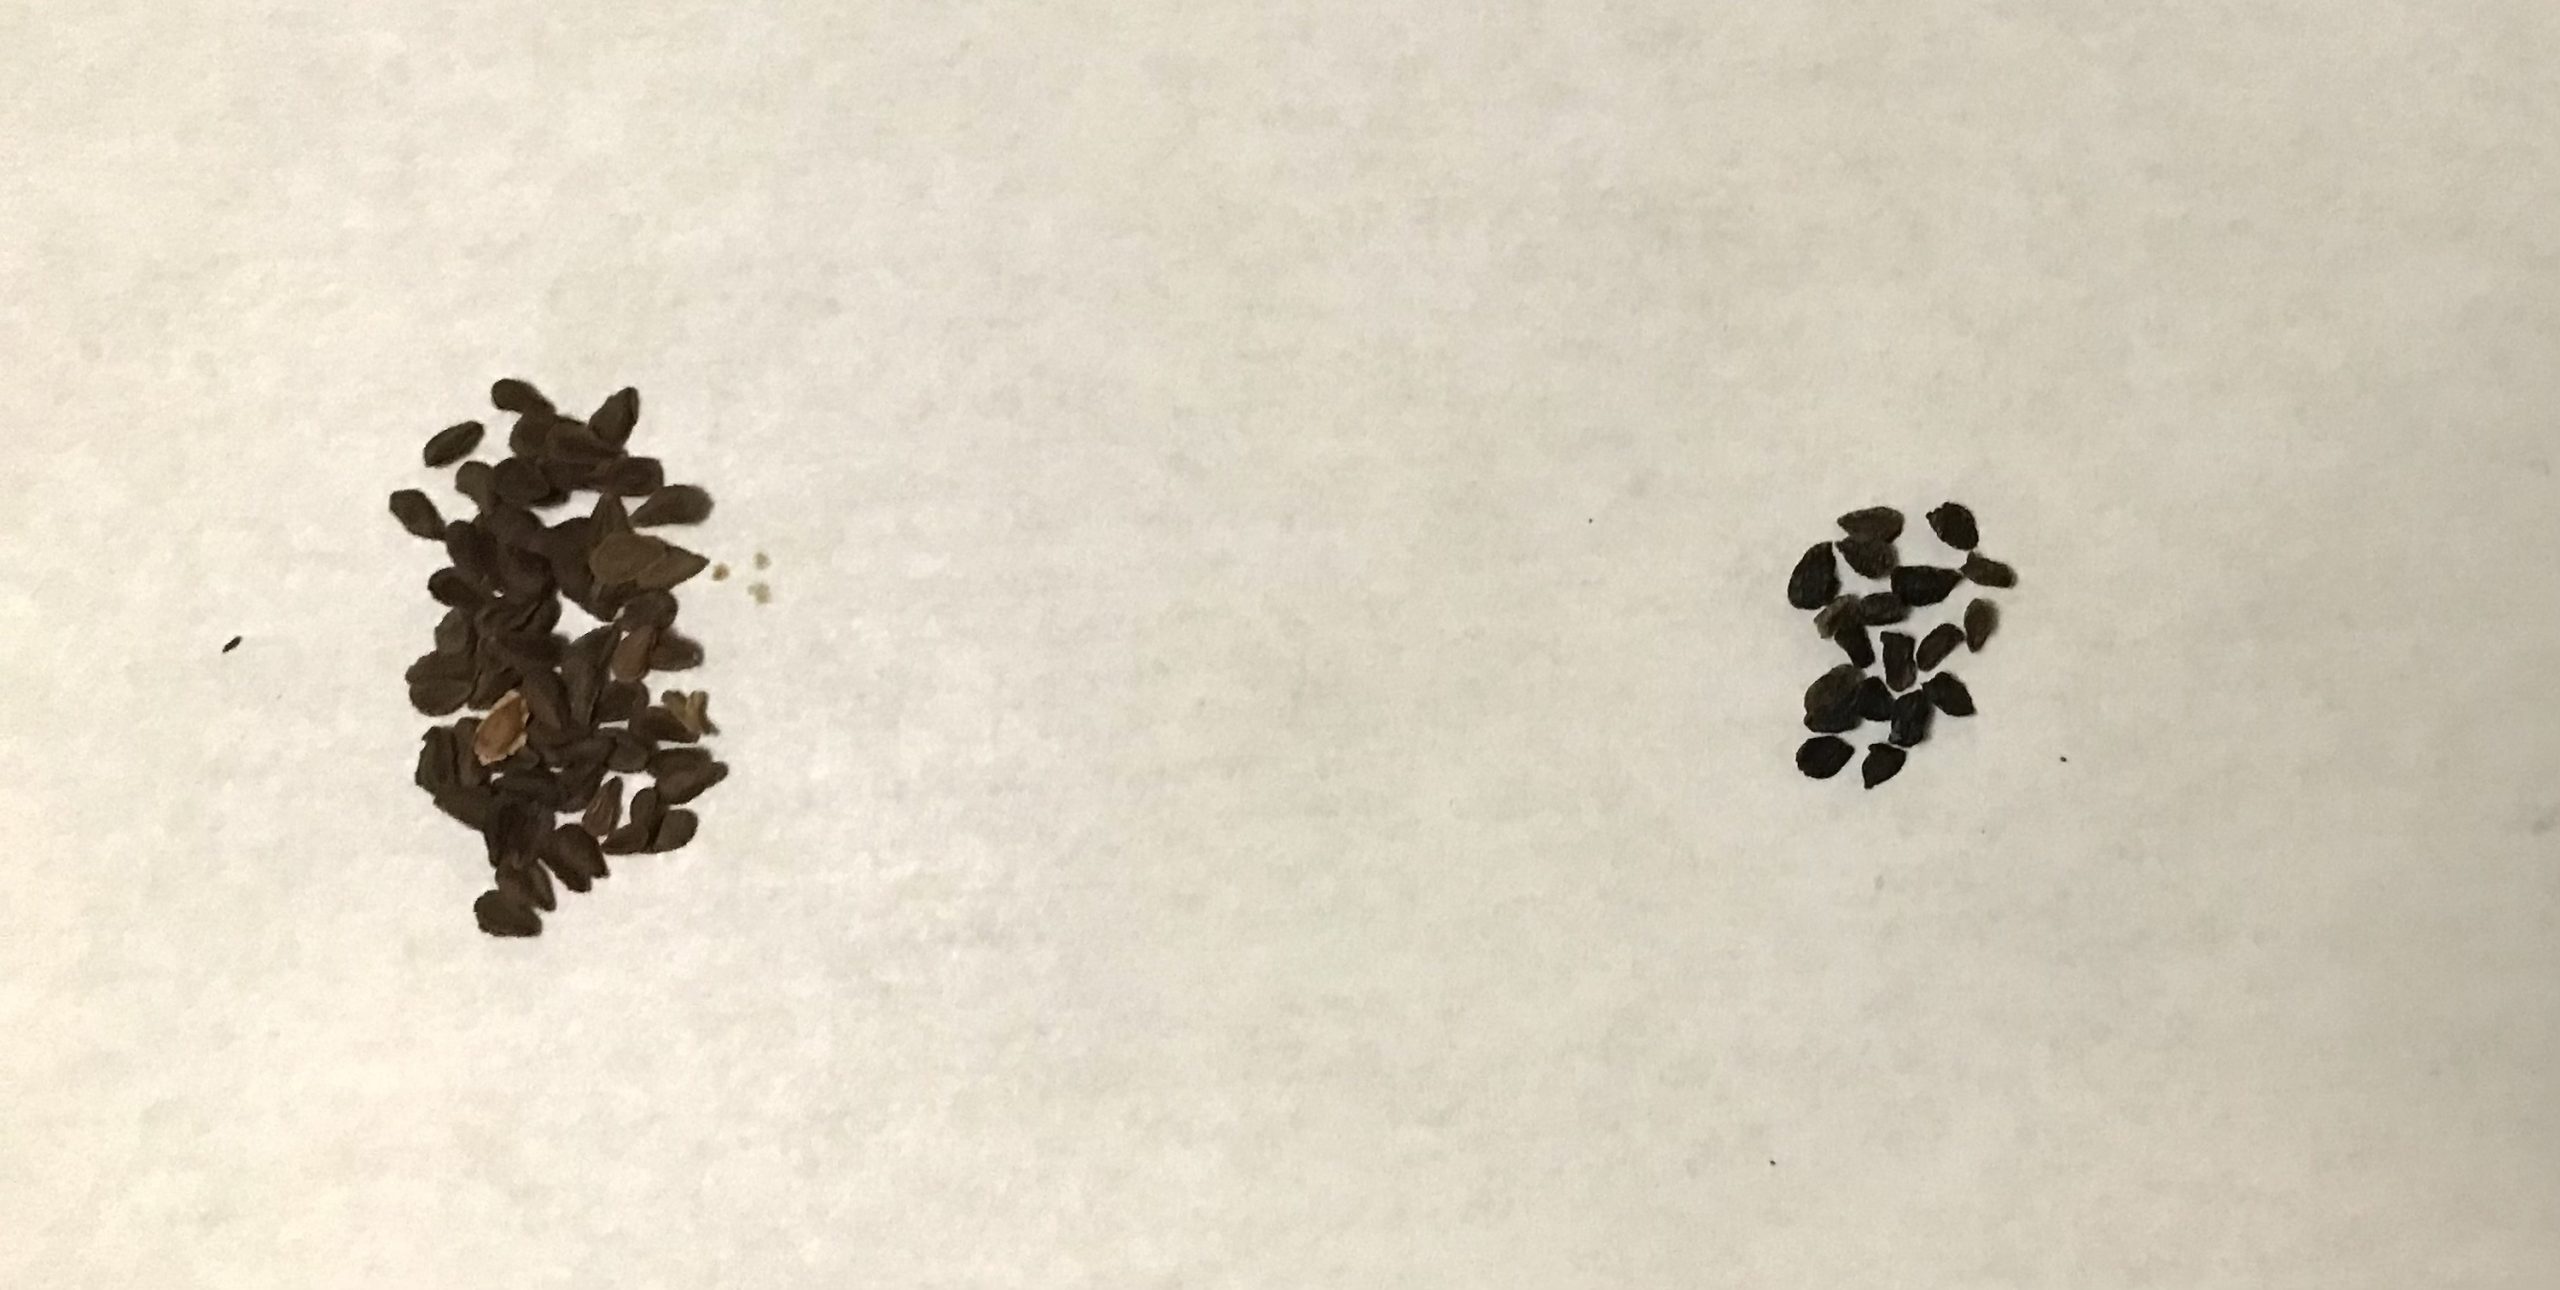
Supermarket garlic (left): It cost less than $0.65 per bulb. Seed garlic (right): It cost about $18.00 for this bag, making it roughly $5.40 per bulb. The sizes of the seed garlic bulbs, and cloves inside, were bigger than the supermarket variety, however.

Garlic is planted in the fall. In my area, they say that mid to late October is the best time to plant. So, my experiment is already up and running. In one of my 50-gallon planters, I planted both supermarket garlic and seed garlic. Both types were softneck garlic, although they are different cultivars as I couldn’t find seed for the supermarket variety. The seed garlic I planted is called Lorz Italian. Sharing the same planter, both types are in the same type of soil, will get the same amount of watering, and the same amount of sun. I planted the garlic cloves in a grid with alternating types. That way, if — for some reason — one section of the planter was more favorable to growing garlic, both types would be growing in it. That’s not likely, but a good experiment is designed to control for all possibilities.

Everything in the experiment was designed to treat both types of garlic the same way. That way, any differences between them should be due to the experimental variable (supermaket or seed), not to differences in how they were raised. I’ll give more “science-y” details about this experiment in a later post. These will include a discussion of sample size, statistics, and whether this experiment has the power to answer the experimental question. I will also discuss limits to the inferences that can be drawn from the data and more. 

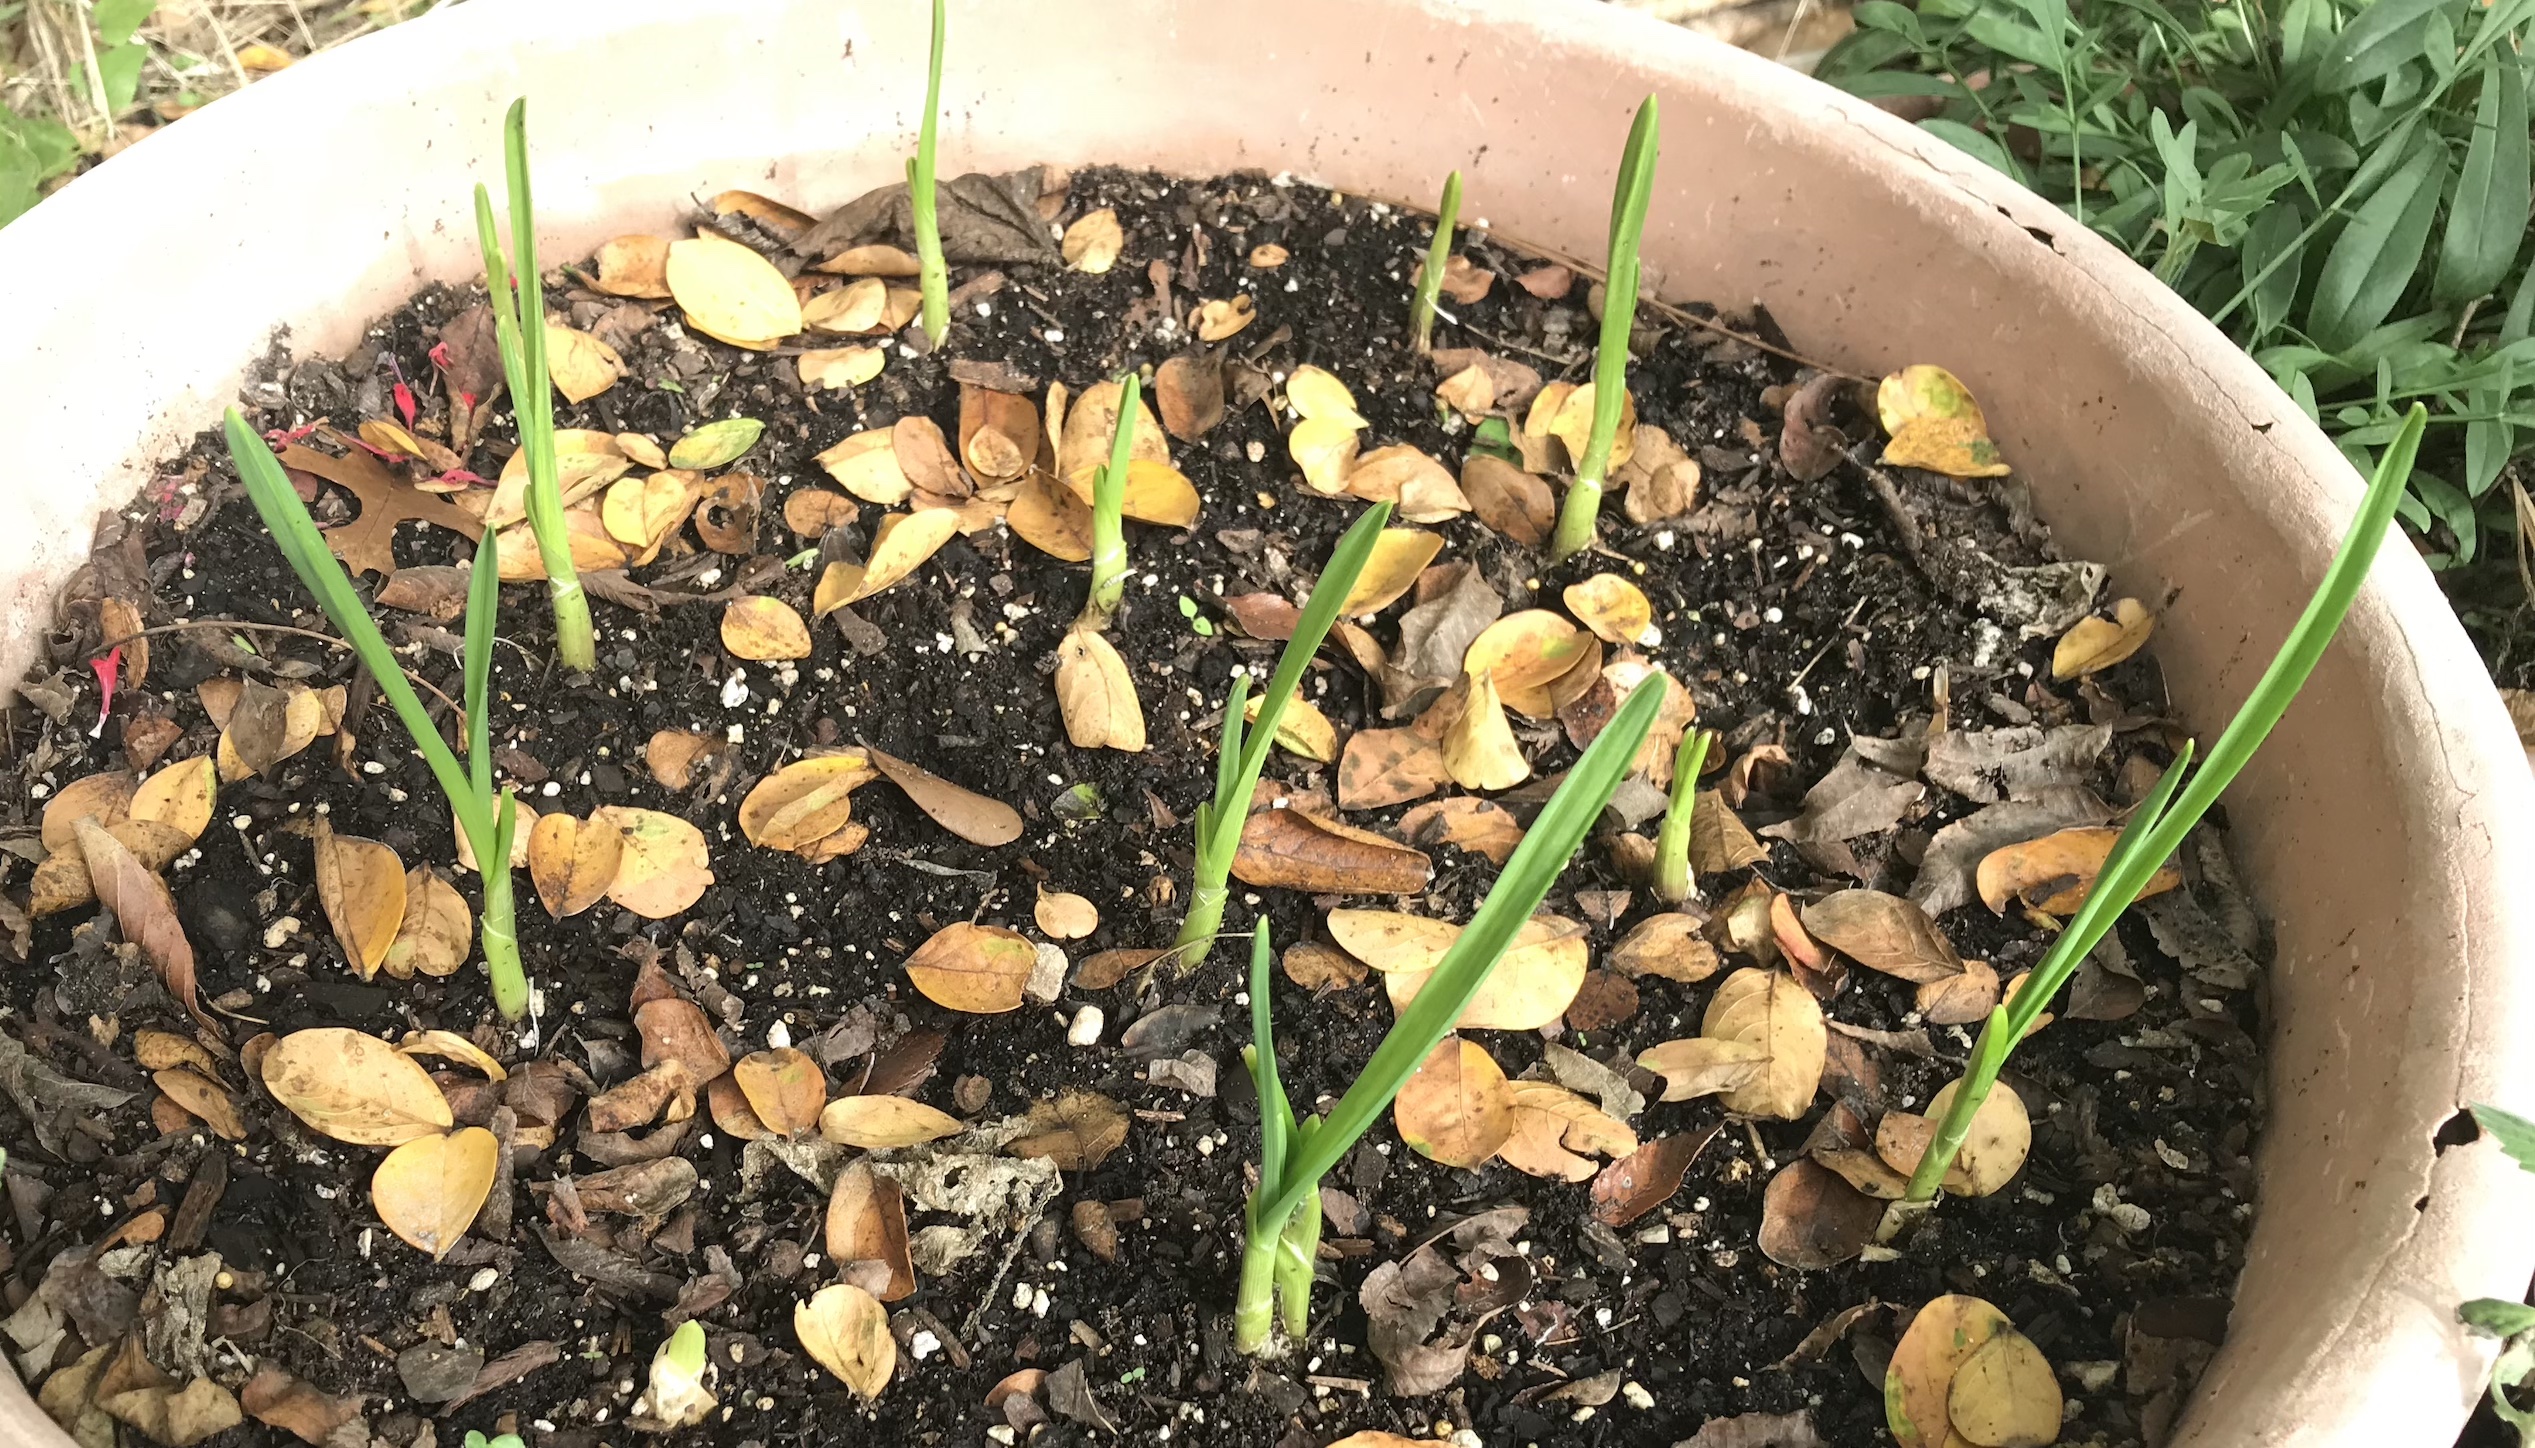
On the left, a picture of the planter after the supermarket garlic was planted, but (immediately) before the seed garlic was. The red markers show where the seed garlic will go. The supermarket garlic is planted to the left or right of the markets, with the spacing being even. The cloves are all separated by 5 inches. On the right, the planter today, with a few sprouts visible.

I planted 10 large, healthy-looking cloves from the supermarket garlic and 10 from the seed garlic. The seed garlic cloves were substantially larger than the supermarket cloves. (I still have some of each type left and will weigh them to get a ballpark difference. I should have done that with the actual cloves I planted, but didn’t think about it until after they were in the ground.) I will assess the germination rate of each type. In the summer, I will give a rating based on how large and healthy the plants look during mid season. I will also reassess at maturity. Most importantly, at harvest time I will weigh the garlic heads to see if one is yielding more than the other. And of course, there will be a taste test. 

I planted both types two weeks ago and they have already started sprouting. (There looks to be a pattern emerging, but I’ll wait until all the data is in before reporting it. For one thing, early sprouting may not be a good sign. Or it might be, I don’t know. However, through the experiment, I have a good chance of finding out.)

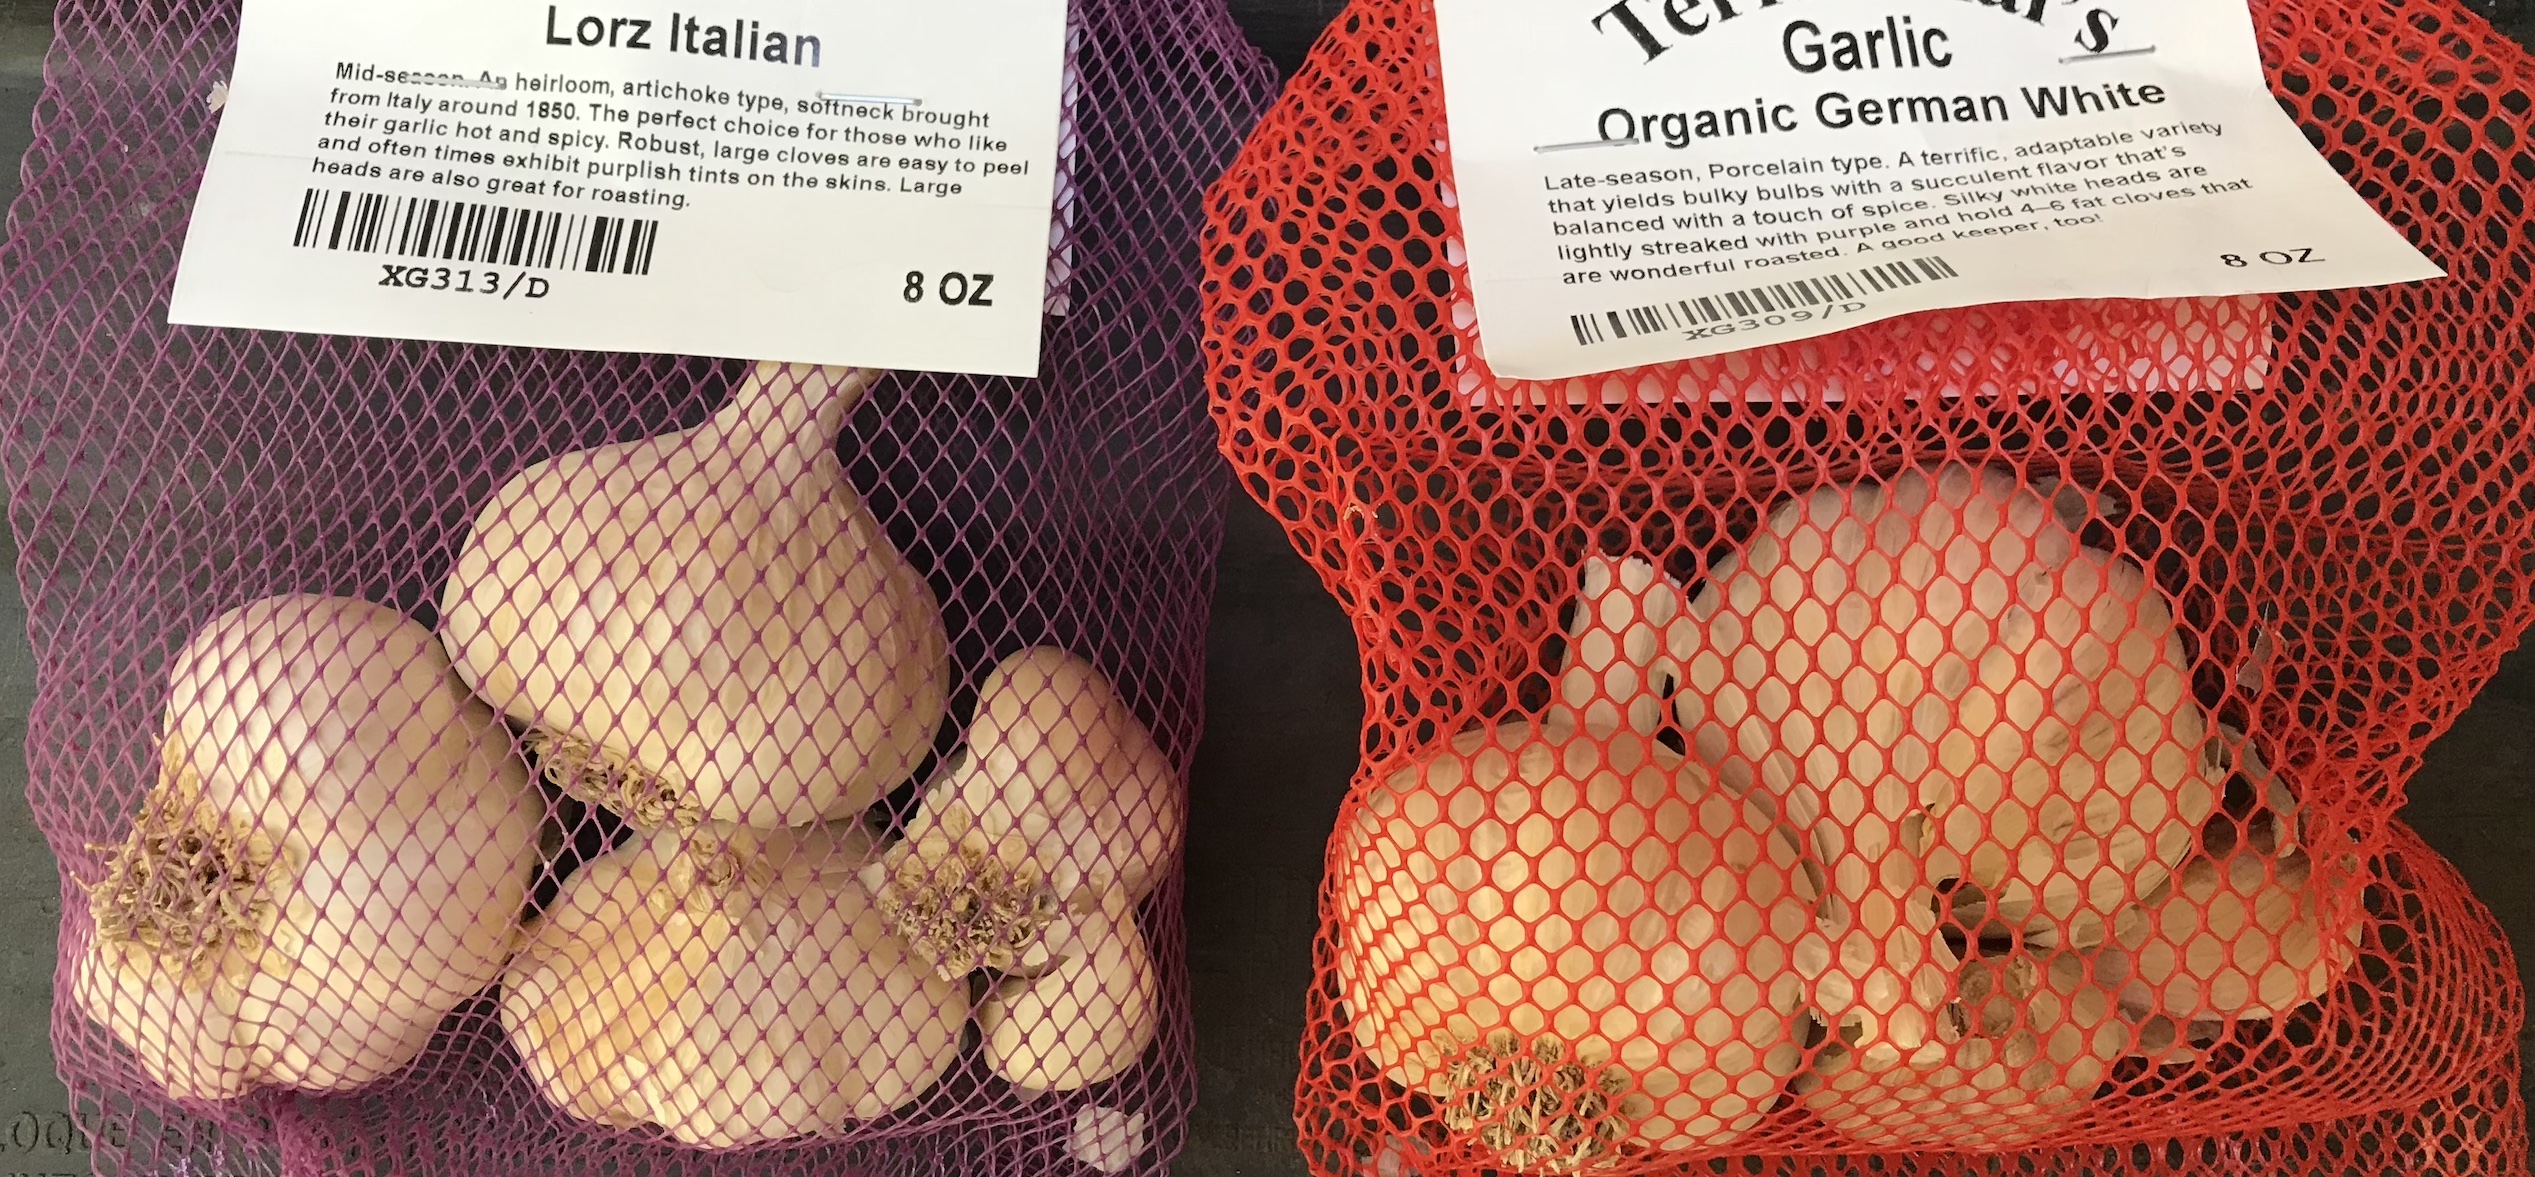
Two types of seed garlic — softneck (left) and hardneck (right).

I also have a second garlic experiment running, although this one is not as well-controlled as the first. In a separate planter, I have planted 12 cloves of hardneck garlic, a variety called German White. I want to see how softneck garlic performs vs. hardneck in my neck of the woods. The answer in every garden guide I’ve ever read is that hardneck garlic will do poorly in the south (where I live). But, I’ll find out. 

My hardneck garlic planter. I’ll need to mulch this down before cold weather arrives (if it does).

Cranberry Zinger (Partial Mash) 

Thanksgiving is coming and there’s still time to brew my Cranberry Zinger. The Cranberry Zinger is a dry, fizzy beer with a tart taste and puckering mouthfeel from cranberry relish. The base beer is an American honey wheat beer.

Fresh whole cranberries are what I use.

The interesting part of the beer is the fruit mixture — the standard mixture for cranberry relish as it is usually prepared for Thanksgiving except for the sugar. Cranberries are tart and strongly flavored, with a relatively high amount of tannins. This, combined with the bitterness from the orange pith, gives the beer a slightly bitter, somewhat puckering quality even though the hop bitterness is low. The combined cranberries, oranges, and Granny Smith apples produce a very fruity aroma, which is enhanced by the high degree of carbonation. 

Don’t attempt to sanitize the fruit mixture. It’s not needed. The pH of the beer and relish mix, plus the alcohol in the beer, won’t support the growth of most brewery contaminants. I usually add two packets of dried yeast to ferment the 5.0 gallons (19 L) of beer, but that’s not strictly required. I like the base beer to ferment quickly and end up maximally dry, though, so I add the second packet to help with this.

A 2-gallon (left) or 3-gallon (right) beverage cooler can hold up to 4.0 lbs. or 6.0 lbs. of grain, respectively. This can yield 2.6 gallons or 3.9 gallons of wort at SG 1.044.

This beer is extremely straightforward to make and turns out great every time. It’s one of my most foolproof recipes. Everyone who has made it says it turned out great and was a crowd-pleaser.

Cranberry Zinger

by Chris Colby

Partial mash; English units


DESCRIPTION

This my cranberry beer that I think goes well with Thanksgiving. It is a honey wheat beer is flavored with cranberry relish — cranberries, Granny Smith apples and Navel oranges (zest, rind, pulp and all). The beer is fairly dry and somewhat tart due to the cranberries. The orange pith lends some bitterness and the cranberry skins give the beer a dose of astringency that keeps the beer from seeming like alcoholic fruit punch.


INGREDIENTS (for 5 gallons)

Water

carbon filtered tap water, preferably low in bicarbonate ions (<50 ppm) 


Fermentables (for an OG of 1.045, not including sugars from fruit, and an SRM of 4)

2.0 lbs. Pilsner malt

2.0 lbs. wheat malt 

1.0 lbs. wheat dried malt extract

2.0 lbs. honey (your choice of variety), at knockout


Hops (14 IBUs total)

Willamette hops (14 IBUs)

1 oz. (of 5% alpha acids), boiled for 30 minutes

Fruit (makes the “virtual OG” roughly 1.046)

4.0 lbs. cranberries (whole, preferably not frozen)

2 medium Navel oranges

2 medium Granny Smith apples


Yeast (for an FG of 1.007 and 4.9% ABV)

22 g (two 11-g sachets) Fermentis Safale US-05 dried ale yeast


Other

1/4 tsp. yeast nutrients (15 mins) 

1/2 tsp. pectic enzyme (in secondary fermenter) 

6.0 oz. cups corn sugar (for priming to 2.8 volumes of CO2)


PROCEDURE

Line a 2-gallon beverage cooler with a large nylon steeping bag and place crushed malts in it. Heat 1.5 gallons of water to 164 °F and pour into grains, stirring as you proceed. Place lid on cooler and drape with a heavy towel, to retain heat. Let grains mash undisturbed for 40 minutes. Then, lift lid and stir mash and let it mash for another 5 minutes. Recirculate the wort by drawing off 1 or two cups at a time and returning the liquid to the top of the grain bed. Heat 2.0 gallons of water to 180 °F. (Yes, this is hotter than most homebrew sources would recommend. Trust me. Or don’t.) Draw of 1–2 cups of wort and place in brewpot. Then, add that same volume of hot water to the top of the grain bed. Repeat until you have collected 2.5 gallons of wort. Begin heating as soon as the first few cups of wort are in the brewpot. Ideally, the wort should come to a boil right as you are adding the last runnings of the wort to the brewpot. Boil for 45 minutes. Add boiling water, if needed to prevent boil volume from droping below 2.0 gallons. With 30 minutes left in the boil, add the hops. With 15 minutes left in the boil, add the Irish moss. With 5 minutes left in the boil, stir in the dried malt extract. At the very end of the boil, stir in the honey and let the wort sit for 5 minutes before cooling. After the boil, chill wort with wort chiller or by placing the brewpot in a sink of tub of cold water. Drain hot water and replace with cold water every 5 minutes. Add ice after the first 3 water changes. Transfer wort to a fermenter, aerate, and pitch the yeast. Ferment at 68–70 °F. When fermentation is complete, make cranberry relish. Do this by rinsing the fruit in water, then combining cranberries, apples (minus the cores) and whole oranges (rind and all) in a food processor. Blend to the consistency of cranberry relish, Place fruit in sanitized bucket fermenter and rack beer onto it. (You can put the fruit in a nylon steeping bag to keep it contained.) Add pectic enzyme. Let fruit contact the beer for 7–10 days, then rack beer to bottles or keg. Carbonate to 2.8 volumes of CO2.


Cranberry Zinger

by Chris Colby

Partial Mash; metric units


INGREDIENTS (for 19 L)

Water

carbon filtered tap water, preferably low in bicarbonate ions (<50 ppm)


Fermentables (for an OG of 1.045, not including sugars from fruit, and an SRM of 4)

0.91 kg Pilsner malt 

0.91 kg wheat malt

0.45 kg wheat dried malt extract

910 g honey (your choice of variety), at knockout


Hops (14 IBUs total)

Willamette hops (14 IBUs)

28 g (of 5% alpha acids), boiled for 30 minutes

Fruit (makes the “virtual OG” roughly 1.046)

1.8 kg cranberries (whole, preferably not frozen)

2 medium Navel oranges

2 medium Granny Smith apples


Yeast (for an FG of 1.007 and 4.9% ABV)

22 g (two 11-g sachets) Fermentis Safale US-05 dried ale yeast


Other

1/4 tsp. yeast nutrients (15 mins) 

1/2 tsp. pectic enzyme (in secondary fermenter) 

170 g cups corn sugar (for priming to 2.8 volumes of CO2)


PROCEDURE

Line a 8-L beverage cooler with a large nylon steeping bag and place crushed malts in it. Heat 5.7 L of water to 73 °C and pour into grains, stirring as you proceed. Place lid on cooler and drape with a heavy towel, to retain heat. Let grains mash undisturbed for 40 minutes. Then, lift lid and stir mash and let it mash for another 5 minutes. Recirculate the wort by drawing off 1 or two cups at a time and returning the liquid to the top of the grain bed. Heat 7.6 L of water to 82 °C (Yes, this is hotter than most homebrew sources would recommend. Trust me. Or don’t.) Draw of 1–2 cups of wort and place in brewpot. Then, add that same volume of hot water to the top of the grain bed. Repeat until you have collected 9.5 L of wort. Begin heating as soon as the first few cups of wort are in the brewpot. Ideally, the wort should come to a boil right as you are adding the last runnings of the wort to the brewpot. Boil for 45 minutes. Add boiling water, if needed to prevent boil volume from droping below 7.6 L. With 30 minutes left in the boil, add the hops. With 15 minutes left in the boil, add the Irish moss. With 5 minutes left in the boil, stir in the dried malt extract. At the very end of the boil, stir in the honey and let the wort sit for 5 minutes before cooling. After the boil, chill wort with wort chiller or by placing the brewpot in a sink of tub of cold water. Drain hot water and replace with cold water every 5 minutes. Add ice after the first 3 water changes. Transfer wort to a fermenter, aerate, and pitch the yeast. Ferment at 20–21 °C. When fermentation is complete, make cranberry relish. Do this by rinsing the fruit in water, then combining cranberries, apples (minus the cores) and whole oranges (rind and all) in a food processor. Blend to the consistency of cranberry relish, Place fruit in sanitized bucket fermenter and rack beer onto it. (You can put the fruit in a nylon steeping bag to keep it contained.) Add pectic enzyme. Let fruit contact the beer for 7–10 days, then rack beer to bottles or keg. Carbonate to 2.8 volumes of CO2.

Cold Conditioning Native Seeds (I)

Fresh garden vegetable seed will generally germinate promptly and evenly after planting. For example, if you plant 100 green bean seeds in the correct soil temperature range and water them adequately, they will begin to sprout after about 7–10 days. And, on average, 98 or more of them will emerge over the course of the next few days. The same goes for most commercially cultivated annual flower seeds. If you try that with many native plant seeds, the result will be much different. 

In the best case scenario, most of your native seeds will start to sprout relatively soon. But in some cases, early germination may be sparse and the rest will appear slowly and unevenly. Some seeds may even lay dormant until the next year. By staggering germination times, native plants avoid putting all their eggs in one basket. Their seeds will sprout at different times and hopefully at one point the conditions will be just right for them to flourish. 

In the worst case scenario, none of your seeds — or very few of them — will germinate. Many native plants additionally require some sort of trigger to get them to germinate. One of the most common of these requirements is a period of low temperatures. (Other seeds require alternating periods of hot and cold or other treatments. In general, a treatment meant to increase the germination rate of seeds is called stratification.)  Milkweeds are one example of seeds that benefit from being exposed to cold temperatures before planting, but this very common for native perennial seeds. 

Milkweed seeds (left) and monkshood seeds (right) are two of the many native perennials that benefit from cold conditioning.

In the wild, of course, the cold temperatures are supplied by winter. Seeds that form during the spring, summer, and fall are spread by the wind or by animals. Some of them end up in a location that is suitable for germination. During their time in (or on) the ground, precipation wets their seed coats and germination inhibitors are washed away. Then, in the winter, a period of cold temperatures primes the seeds for germination. When warmer spring temperatures arrive, the seeds sprout and the plants start growing. 

As a gardener, you can cold condition your native seeds in a couple of ways. Obviously, you can plant them outdoors before your first frost and simply wait for spring. To do this, you should clear the planting location of any existing plants. Unless you experience a drought, however, you don’t need to tend to the seeds over the winter. However, it may help to add some mulch over the area and label it with a stake so you remember what sprouts you are expecting in the spring.

The ground on the left needs to be cleared before seeds are planted. If not, it will be hard to tell the sprouts of desired plants from the existing plants growing there. Bare ground (right) can be mulched to keep the soil from drying out.

You can also cold condition seeds in your house to prepare for early spring planting. There are several ways to do this, and I will cover that in a later post.