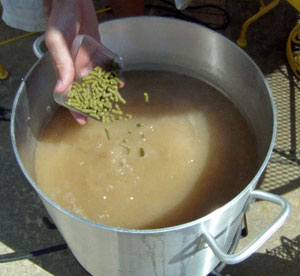
American hops are featured at the end of the boil.
The start of “brewing season” is almost upon us. Brewing season is that time of year when temperatures fall low enough to allow most homebrewers to ferment ales with little or no active temperature control. James and I have got a bit of a jump on brewing season with some recent brewdays. Here’s what we are working on right now. What are you brewing?

")


Recent Comments