Making wine at home is a relatively inexpensive, stress-relieving hobby (most of the time!) that everyone should try. If you love wine, it’s a great way to save money on your hobby and a chance to get creative and make the wine you’ve always dreamt of! You can be obsessively detailed with every aspect if you want (and commercial winemakers are) but you really don’t need to be to enjoy good wine at the end. In this article, I explain five simple rules that should be followed on your winemaking journey.
1. Be Obsessively Clean
Wine spoilage is a real threat and one that you can help avoid by keeping high standards when it comes to wine hygiene. From the grape crush to bottling, you need to keep your wits about you and stay clean at all times. That means any winemaking tools or apparatus that come into contact with your wine need to be sanitized. That means your hands and arms and your arms too! Pretend you’re the surgeon and the wine is your patient! So what does this mean? Give your equipment a brush with hot water first to remove dirt and grime first.
Once visible dirt and grime have been removed you need to use an approved sanitizing agent. A combination of dilute metabisulfite and citric acid is commonly used but I recommend avoiding using sulfites at every clean as you need to thoroughly rinse it off with sanitary (boiled) water to prevent residual sulfites from affecting the balance of your wine. I recommend using a solution like StarSan (commonly used in brewing) which is an acid-based biodegradable sanitizer. Don’t use anything too abrasive to clean with as it will scratch your equipment and provide easy hiding places for bacteria. You should clean equipment as soon as it’s been used to prevent dirt and grime from binding to your equipment.
2. Use The Right Yeast
There are many different types of yeast available for use in winemaking. Be sure to choose a yeast that is suitable for the type of wine you are making. Different yeast will produce different flavors in your wine, and to a large extent will influence the sensory qualities of your wine. Furthermore, using the right yeast will reduce the likelihood of there being problems with the fermentation. When choosing a wine yeast you want to match it to the grape varietal being used. The yeast will complement the specific properties of the grape and allow it to express its maximum sensory potential. You should also consider the alcohol content of the wine you wish to make. Some strains of alcohol have a lower alcohol tolerance and you may find the fermentation becomes stuck because the conditions become unsuitable for them.
3. Monitor Your Fermentation Temperature
Fermentation is a crucial step in winemaking, and the temperature of your fermenting wine is very important. Too high of a fermentation temperature can produce off-flavors in your wine, while too low of a temperature can slow down or stop fermentation altogether. Be sure to monitor the temperature of your fermenting wine carefully and adjust as needed to keep it within the ideal range for the type of yeast you are using. As well as keeping track of the temperature, don’t forget to chart the progress of the fermentation with your hydrometer too. You can read more about hydrometers in winemaking with Tim Edison’s guide at Wine Turtle.
4. Don’t Stir Too Much
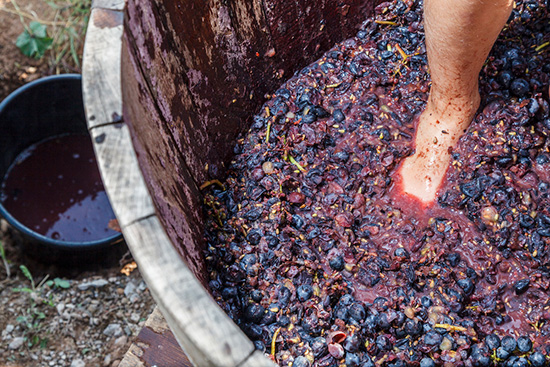
With red wine, stirring is important in the first 24 hours or so because it helps the yeast to do its job by oxygenating the must (the crushed grapes). However, you want to limit how much you interfere with your wine must once fermentation is in full flow. Punching down the cap with red wine (the floating pulp) regularly is really important to stop bacteria from growing on it, but it doesn’t need much of a stir.
With white wine, a gentle stir every 24 hours during fermentation should suffice. The reason for this is to release the volatile sulfur compounds that are created. One of these compounds is hydrogen sulfide which can make your wine smell like rotten eggs!
5. Age Your Wine Properly
Your wine will benefit massively from some aging. This is often the hardest part because it takes some patience and self-control not to drink it. However, you’ll thank yourself in the long run. Aging the wine allows flavors and aromas to develop and mature. It rounds off the sharp, abrasive notes and helps round off the tannins too.
After being bottled your homemade wine needs at least four weeks to age but to be honest you should age it for a lot longer. I’d be more inclined to age red wine for at least 6 months. Whites, on the other hand, don’t benefit so much from age and can be drunk while young. Just make sure you have a place that’s reasonably cool and dark to store your bottles.
Above all remember to have fun! There’s an awesome winemaking community out there full of great people who are more than willing to help out beginners with all the questions we all have. Make sure to set up a profile on one of the many online forums or join a local group in your area. It’ll make the process all the easier and more enjoyable.
[This article is a paid guest column and as such is labelled as an advertisement.]













Recent Comments