Brew a six-pack in less than an hour? Why not?
I’m a big fan of small batch brewing. It allows experimentation with less risk, provides a less expensive entry point for first-time brewers, and enables brewing in small spaces where a “full size” brewing setup is impractical.
One of the objections I hear the most about small batch brewing goes something like this: “Why would I spend the same amount of time brewing a six pack of beer that I spend in brewing two cases.” That objection stems from a misconception. Sure, mash rest times and boil times remain the same, but the time it takes to heat up water or wort and cool it down can be radically different.
In order to prove my assertion that small batch brewing can be a very fast and easy way to play with ingredients, I set out to see just how quickly I could brew a six-pack batch from pouring the water into the kettle to cleaning the last of the dishes.
There were two keys to my approach. I would use extract, and I would use the 15-minute pale ale technique to cut down time in the boil. Using no grain would mean no time in steeping or mashing. Adding lots of hops at the beginning of a short boil would result in a pale ale with nice bitterness and a ton of hop flavor and aroma.
Brewing Equipment
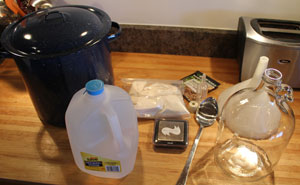
Everything you need. Except yeast. And you don’t need the toaster.
Small batch extract brewing needs very little gear. In this case:
- Kettle large enough to boil three quarts (2.8 liters)
- Stirring spoon
- Scale accurate enough to measure grams
- One-gallon (4 liter) jug
- Stopper
- Airlock
- Funnel
- Thermometer
Basically, you just need a pot to boil the wort and a jug to ferment it. You can’t get much simpler than that.
The Ingredients
The ingredient list is even more basic than the equipment list. You need water, malt (extract), hops, and yeast. Hey, Reinheitgebot fans, look at me go! Here’s what I used:
- 1 lb. (0.45 kg) Light Dry Malt Extract
- 1 oz. (28 g) Simcoe Hop Pellets – divided into two additions
- About 3 grams Safale US 05 Dry Yeast
- 3 qts. (2.8 L) Drinking Water (or filtered tap water)
The Brewday
I wanted to measure the total time it took to brew this beer. So, my timer would start when I had all my equipment and ingredients laid out, and it would end when the last of the dishes were clean and set to dry.
I hit “start” on the stopwatch and measured the water into the brewpot. I put the gas burner on “high” and turned to the sink. While the water was heating, I mixed together my sanitizer solution and put my fermentation gear into it. Leaving that to soak for a couple of minutes, I turned back to the stove. By this time, the water was warming, so I poured in the dry malt extract, which had come from the local homebrew store in a handy one-pound bag.
It took 16 minutes for the wort to come up to a boil. At that time, I added ten grams of Simcoe pellets and started a 15-minute countdown timer. The hops came in a one-ounce packet (also handy). While the wort boiled, I set the sanitized gear on a paper towel on the counter to drain.
At the end of the boil, I added the balance of the one ounce of hops (18 grams) and turned the flame off. I ran cold water into the sink for an ice bath. The kettle sat in the cold water until the initial heat was lost – about two minutes. Then, I added the contents of my freezer’s ice maker to a fresh sink of cold water.
In my experience, wort cools faster if it’s in motion. So, I moved the kettle in the sink in a circular motion. Ten minutes later, according to my infrared thermometer, the wort had reached pitching temperature.
I dried the outside of the kettle and poured the wort (all of it) through the funnel into the fermenter. I added about a third of a packet of dry yeast, let it hydrate, then shook the jug to aerate. All that was left to do was the dishes.
My total time brewing that morning was 53 minutes. (I later challenged my friend, Steve Wilkes, to beat my time. See how he did in the Basic Brewing Video episode at the end of this piece.)
Fermentation and Bottling
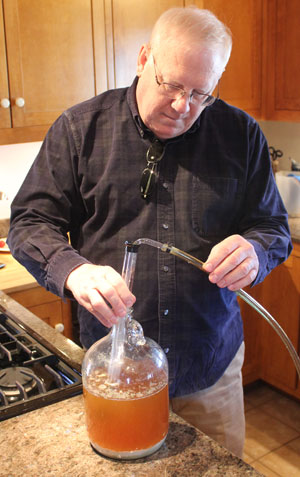
Steve Wilkes expertly mans the auto-siphon.
Fermentation went along normally. I let the beer ferment for a week, and after the yeast dropped out of suspension, I decided to bottle. I asked my buddy, Steve, to help.
Bottling a small batch is a two-person job – or at lest that’s the way I do it. I have a small auto-siphon that is perfect for this sort of thing. I connect a hose to the auto-siphon and insert my bottling wand in the other end of the hose. One person is in charge of starting the siphon from the fermenter and making sure the end of the auto-siphon stays out of the trub. The other person handles delivering the beer into each bottle.
I like to prime small batches with priming sugar tablets. The ones I use are about the size of on aspirin. The manufacturer recommends four tablets per bottle for “standard” carbonation rates.
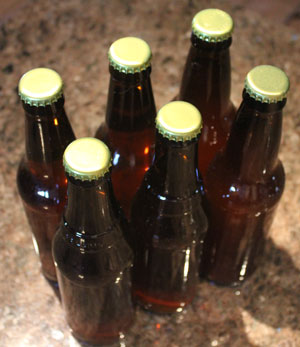
At the end of bottling, Steve an I had exactly six bottles of hoppy ale. By the way, the entire bottling process from start to finish, including cleanup, was around 30 minutes.
Tasting
The proof of the pudding is in the tasting, and the proof of the legitimacy of this process is in the glass. The beer is cloudy because of the large amount of hops, but the flavor and aroma more than make up for any reservations you may have about the appearances. The Simcoe hops jump right out of the glass into your nose, and their flavors dance all over your tongue. (Can you tell I love hops?)
Since I posted the Basic Brewing Video episode (below), I’ve heard from other homebrewers who have tried this technique. Jym Ferrier tells me by Twitter that his first attempt was only 44 minutes and 27 seconds. Meanwhile, Matt Weide brewed a honey pale ale in just under 47 minutes. Both Jym and Matt went on to brew second one-gallon batches using the same method on that same day. Jym’s second batch was a hoppy saison.
I think this experiment is a success in demonstrating the practicality of small batch brewing. This is not to say that I’m always going to brew one-gallon extract batches. However, when I have some leftover hops and extract – and perhaps a dry yeast that I haven’t played with – this speedy process is an excellent way to spend an hour.

I appreciate the point you’re making that extract brewing allows you to make beer quickly. I still stand by my thinking that if I’m going to dig out my all-grain equipment, I might as well make 12 gallons.
I am going to use this technique to learn about different hop varieties. This would allow me to consistently create a beer whose only difference would be the hops.
Thanks for all I’ve learned from you guys.
I’ve been interested in all-grain small batch brewing for some time. Perhaps I could write up my method for performing 5L all grain small batches.
Sure, we welcome contributions from readers.
Just out of curiosity, what AA% were the simcoe hops? Since you compared it to IPA, I’d something similar.
According to my Brewer’s Logbook, they weighed in at 13% AA.
Brewed 2-1 gallon experimental batches last night. Fermentation is on its way – airlocks active. It was so easy and fun I decided to do 2 batches with different hop profiles. I added an extra 8 oz of water to the 3 QT batches to have a little extra to hydro-test. Batches OG about 1.063.
Water: I used the HyVee grocery store RO drinking water. I also added a little less than 1/5 tsp of Gypsum to each batch. Wort samples were sweet and hoppy! A 15 minute boil can truly introduce an explosion of bitterness and aroma.
Now we wait to see how FG ABV and flavor turn out – cannot wait. Thanks to you James!