Blending Sour Beers (I)

A great sour beer is a thing of beauty. However, there is always an element of luck when brewing a sour beer. Multiple microorganisms in a batch can sometimes act in unusual ways. Additionally, sour beers often change over time, becoming drier and more sour. One way to produce a great sour beer is to brew multiple batches and blend them.

One thing to keep in mind, however, is that you can’t save bad beer by blending it with good beer. If you blend two gallons of great beer with one gallon of bad beer, you’ve got three gallons of bad beer. Sour beers may have a funk that can be lessened to the point of being acceptable — particularly in lambic-style sour beers — but if a sour beer is undrinkable, pour it. Aways remember that the goal of a blend is to produce a beer that is better than either of the two (or more) component beers considered individually.

There are no rules to blending beers, no equations to instruct you on how to blend. (There are equations that will help you target a final ABV or characteristic of the beer.) However, there are some strategies that have been tried and generally work well. Looking at how lambic producers blend their sour beers is informative.

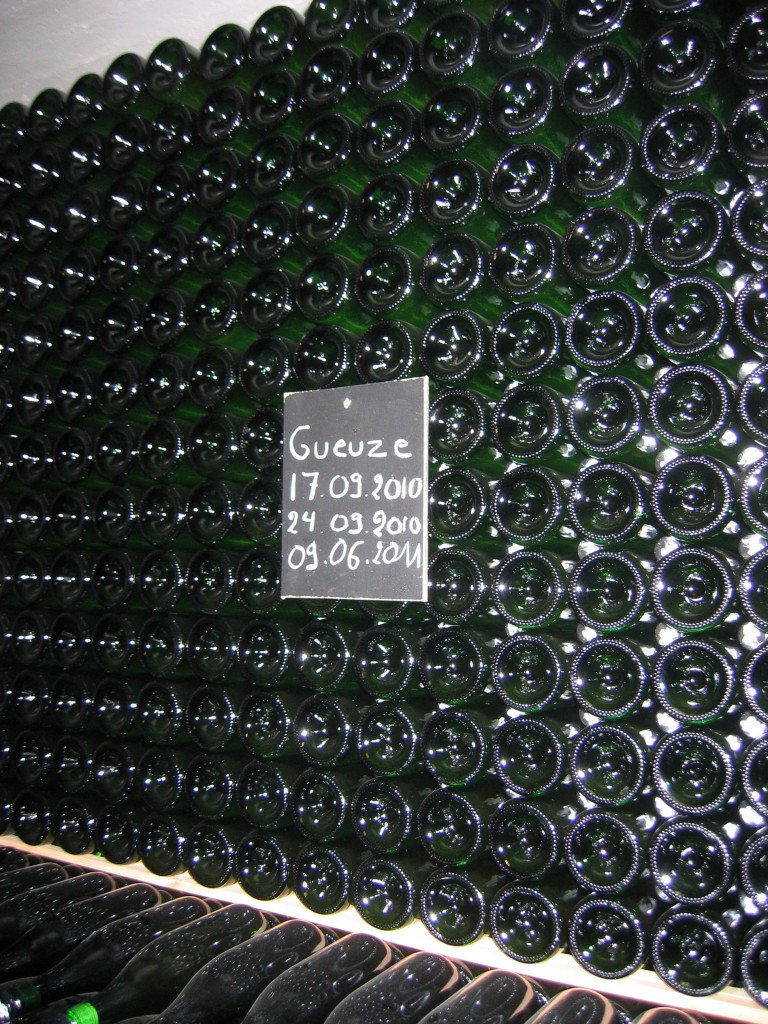
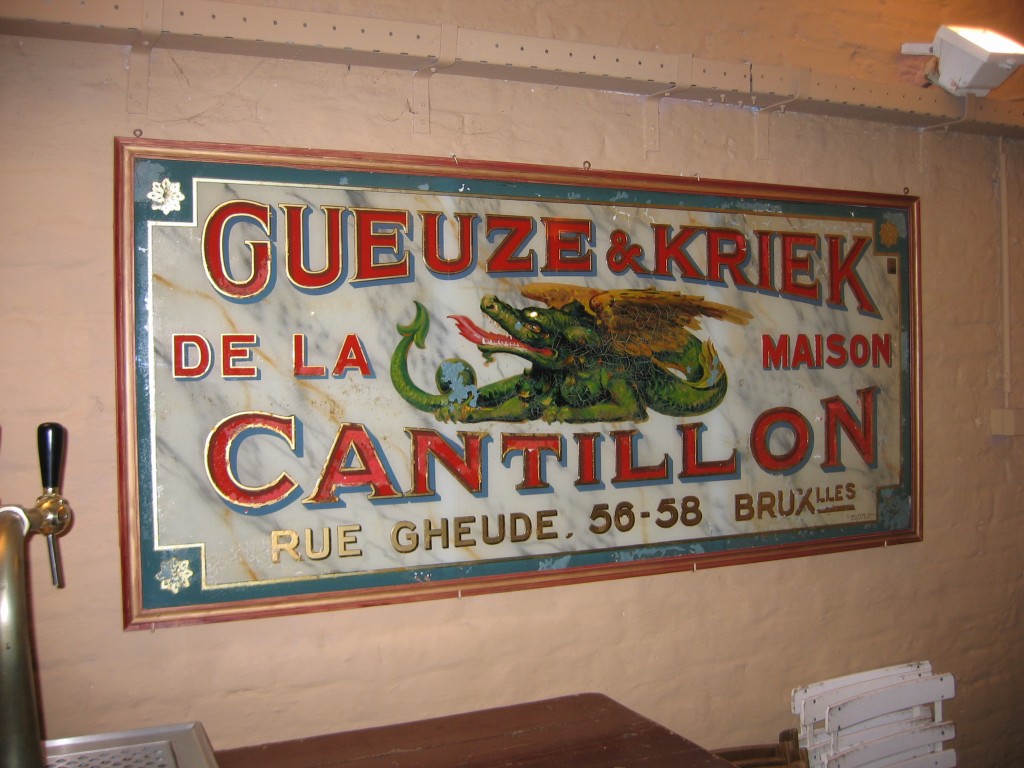
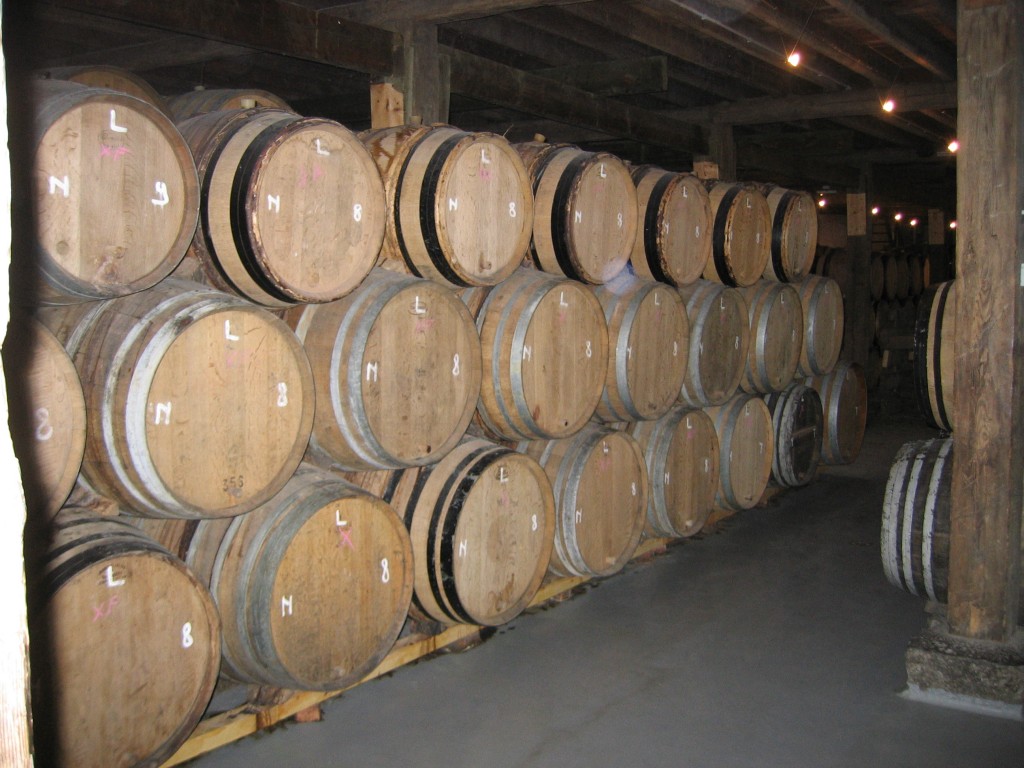
Traditional lambic producers have a brewery full of barrels to select from when blending their beers. The traditional blended lambic is a gueuze, made from one, two, and three year old lambics. [If you follow the plan in this article you will have three 5.0-gallon (19-L) buckets of lambic.] One-year-old lambic will still have some carbohydrates not fermented by the microorganisms. As such, it will likely still show a small amount of body and sweetness. It will be the least sour of the three. In contrast, in the three-year-old lambic, the microorganisms will have completely utilized the carbohydrates (or very nearly so). It will be the most dry and acidic. The two-year-old lambic will have a character intermediate between these two.

The simplest blend, and the one that maximizes your volume, is to simply blend the full volume of all three together. This would give you 15 gallon (57 L) of gueuze. However, the best tasting blend is unlikely to be an even blend of three. If you enjoy a very acidic and dry lambic, your blend should be dominated by the third year old lambic. For example, you may want to blend all 5.0 gallons (19 L) of the three year old lambic with 2.5 gallons (9.4 L) of the two year old lambic and only a little over 1.0 gallon (3.8 L) of the young lambic. This would yield between 8.5 and 9.0 gallons (32–34 L) of gueuze. The leftover lambic could be used for fruit lambics or racked to a carboy and stored for future use in other blends. (If you do this, make sure there is as little headspace in the carboy as possible.)

For a mellower lambic, you may want to blend all of the two-year-old lambic with smaller amounts of the young lambic and enough three-year-old lambic to hit your preferred level of acidity. You can take samples and make test mixes to determine your favorite blend. The level of funk in each of three beers may also lead you to change their proportions. Although you have a wide variety of options, a gueuze blend should never be dominated by the young lambic. It will not be sour enough and it will age unpredictably in the bottles.

Once blended, the gueuze should sit for about a year in bottles (or kegs) before it is consumed. Gueuze is traditionally bottle conditioned, with enough added sugar to highly carbonate the beer. It is almost as highly carbonated as Champagne. Given that your blend will include some young lambic, carbonation can be tricky as you will not know how much unfermented carbohydrates are in your blend. You may want to hedge your bets a bit and add a little less sugar for priming than you need to hit your target CO2 level. Or, you can simply be aware of the possibility of over carbonation and drink the beer soon.

In an upcoming article, I’ll discuss sour beers other than lambics and explain the nuts of bolts aspects of blending.
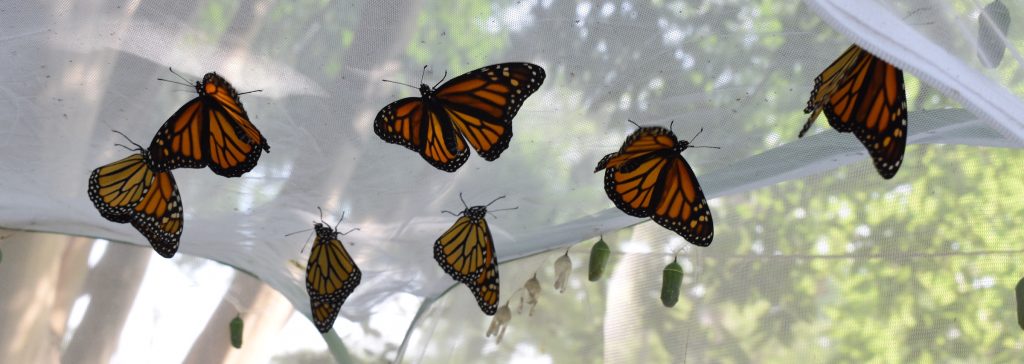
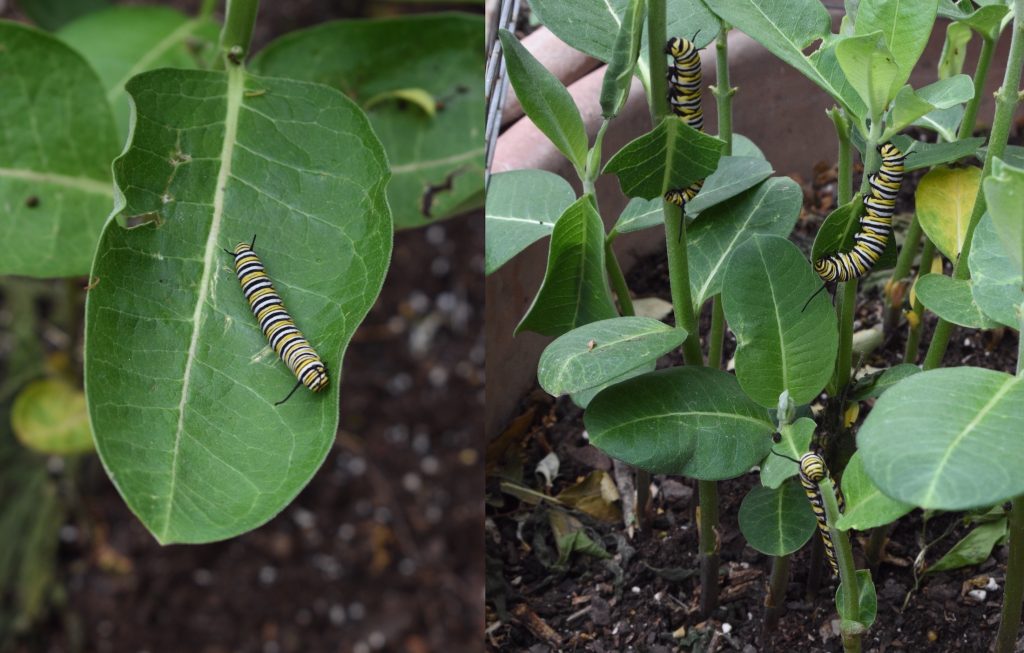
My 2023 Monarch Raising Project (III: Disease)

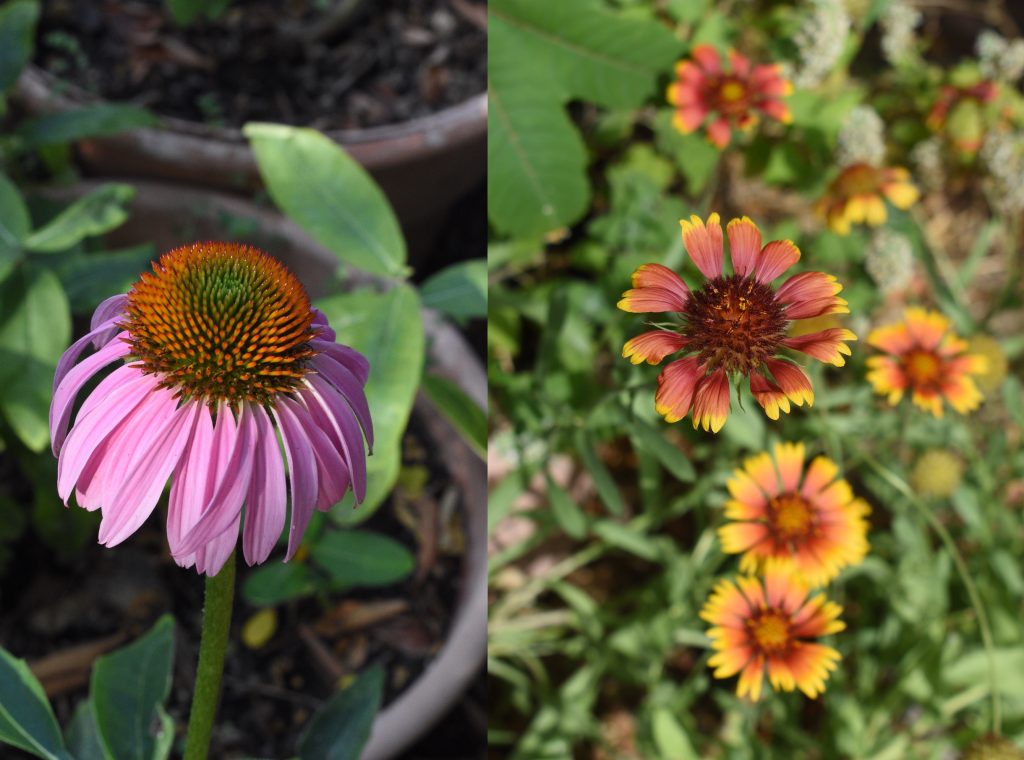
[During the spring of this year, I hope to raise and release 240 monarchs. This is the third post in a series about my monarch butterfly raising project. The first post in this series dealt with growing milkweeds, the host plants for the monarch butterfly. The second post dealt with native flowers to attract the butterflies. This post is about dealing with the possibility of disease.]

In order to raise and release 240 monarchs butterflies, I will need to grow a large amount of milkweed in a fairly small space. I will also have too rear the butterflies in close quarters inside my butterfly enclosures. Anytime any species is found at a high density, the possibility for a disease to spread through the population is present. 

In order to minimize the possibility of a disease outbreak, I will need to do two things — monitor the plant and butterfly populations for diseased individuals and isolate them. It would be great if I could prevent all of the diseases that affect milkweeds or monarchs from arriving, but that isn’t possible. Insects arriving in the garden bring many diseases. Spraying insecticide to kill these insects is not an option because that would also kill the monarchs. Likewise, netting the plants would keep insects off them, but that would include the monarchs. So, I can’t prevent the arrival of insect-borne diseases. With that being the case, I need a plan to deal with insect-borne diseases, should any arrive. I can prevent fungal diseases by avoiding overhead watering and pruning the plants to increase airflow around them, if needed. 

One piece of good news is that I’ve never had a problem before. By the end of every season, my milkweeds are infested with milkweed aphids and milkweed bugs. And sometimes, their leaves get a bit mottled (suggesting some sort of disease). However, every spring the milkweed returns and is healthy. I’ve also never detected any problems with disease among the monarchs. I’ve had tachnid fly infestations, but I deal with that by raising the caterpillars in netted enclosures. 

My plan for dealing with disease is to monitor the plants and the butterflies (larvae and adults) for potential problems. If I detect a problem, I will isolate (or destroy) the diseased individuals. If a plant looks ill, I can simply remove it from the garden — hopefully before whatever it had spreads to other nearby plants. Likewise, if I see a caterpillar that looks ill, I can remove it from its enclosure and not add any new monarchs to that enclosure. I have several, so I can rotate through them and sanitize used enclosures before using them again. 

To make disease less able to spread quickly, I will also physically spread out my milkweed plants as best I can. This may not help much if an insect-borne disease arrives, as insects could easily fly from one side of my yard to the other. But it will help with any disease which spreads faster with physical proximity. I will also raise the monarch caterpillars in as many different enclosures as is feasible. That way, if an individual becomes diseased, the disease could only be spread within its enclosure — which could be sanitized before being used again. 

Other than tachnid flies, one of the biggest threats to monarchs is the protozoan Ophryocystis elektroscirrha (often simply referred to as OE). Given the seriousness of OE, I’ll devote an entire post to how I will deal with this, should it arrive in my garden. One of the major things gardeners can do to avoid an OE infestation is not grow non-native milkweed. All of my plants are natives, so that’s not a problem. But, the disease is still worthy of serious consideration. 

At the time I am posting this, it is about 5 weeks away from the milkweeds sprouting and maybe 6 or 7 weeks from the monarchs arriving at my garden in central Texas. I have a lot of milkweed seed cold conditioning (stratifying) right now and I also have several milkweed rhizomes in my refrigerator. These are in addition to the milkweeds in my container garden planters. Things should start heating up in early March. If you’re interested, I hope you follow me on my quest to 240.

Sprouting Tomato Seeds

I have planted my 2023 spring tomatoes over the past two weeks. Standard gardening advice is to plant tomato seeds 6–8 weeks before you anticipate putting the transplants in your garden. The best time for transplants is when all danger of frost has passed and overnight lows are 50 °F (10 °C) or above. For me, it’s now 8 weeks until that time. As such, I planted my tomatoes 1 or 2 weeks earlier than recommended. This is not a big deal. Last year, an early heat wave stopped my plants from setting fruit at what should have been the peak of their productivity. So I wanted to be sure to avoid that this year. 

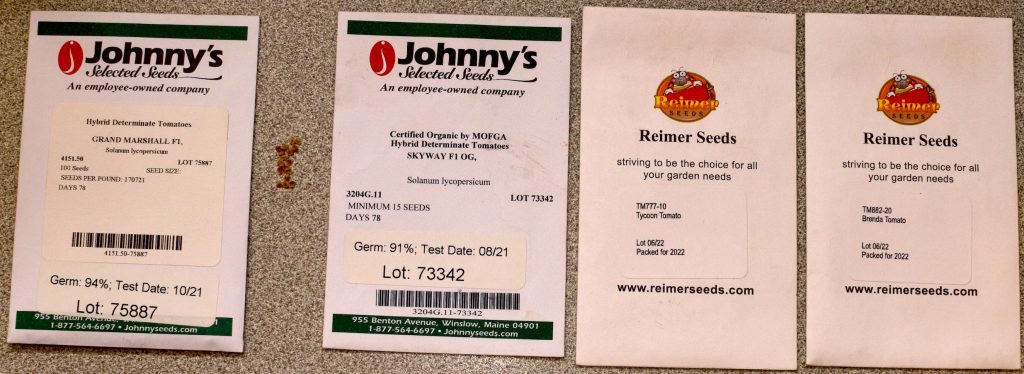
Tomato seed packets and some tomato seeds. All these varieties are TYLCV-resistant cultivars given disease pressures in my area.

The tomato (Solanum lycopersicum) is a member of the nightshade family (Solanaceae), along with potatoes, peppers, tobacco, petunias, and others. This group also includes the poisonous plants Datura spp. (jimsonweed) and Atropa belladonna (deadly nightshade) — both of which of which I grow in my garden.

Planting Tomato Seeds

Planting tomatoes is very straightforward. To do so, fill your flats with potting mix and shake them to settle the soil. Take your finger and press lightly in the middle of each well of the flat, making a depression roughly 1/8” (0.3 cm) deep. Place one seed in each depression and sprinkle potting mix over each seed until it is covered. Getting the exact depth is not important. If you plant the seeds way too deep, over 1/2” (1.3 cm), the seedling will not reach the surface. Too shallow, and the seedling may fall over. However, anywhere in the ballpark of 1/8” (0.3 cm) will work fine. Another rule of thumb is that each tomato seed should be covered to a depth of roughly 3 seed widths.

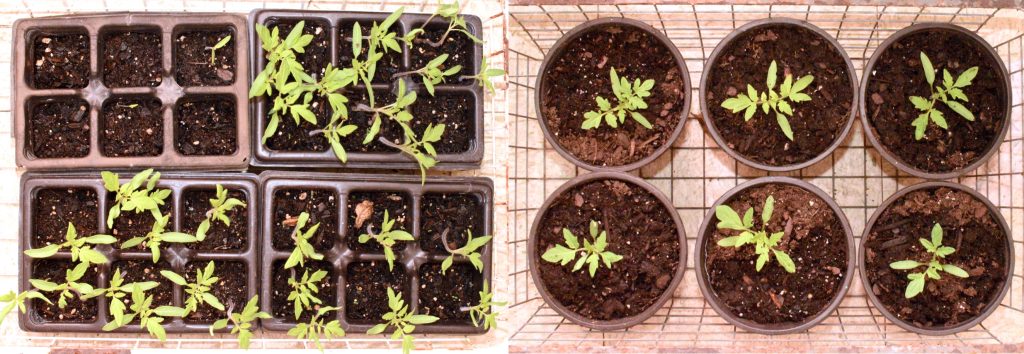
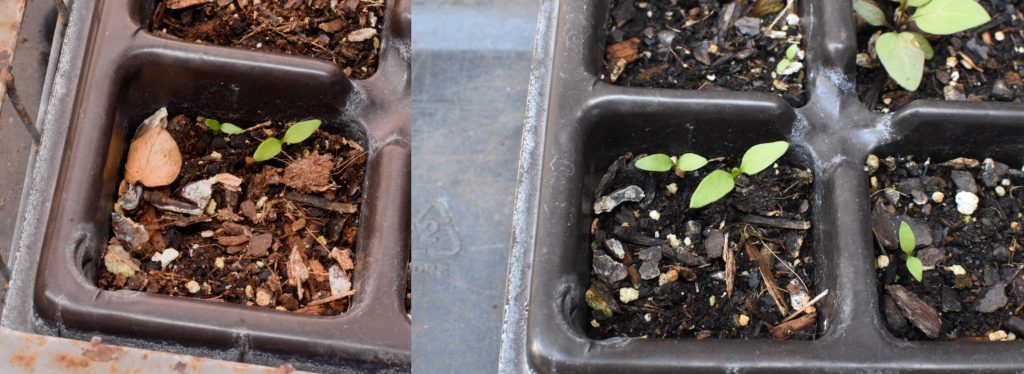
Some newly sprouted tomatoes (left) and some slightly older tomatoes (right). When first sprouted, the plants unfurl their two cotyledons (seed leaves); next their first true leaves emerge from the stem, at right angles to the cotyledons.

Tending to Planted Seeds and Seedlings

While the seeds are sprouting, you will need to keep the potting mix damp. Tomatoes will do best when sprouted at 65–85 °F (18–30 °C). This is a wide range and standard room temperature falls within it. A seedling heating mat will bring seeds to the upper end of this range. I used a heating mat and my seeds started germinating on day 5. Of course, warm and damp is an invitation for mold or other fungi to start growing. However, tomatoes sprout more quickly than any fungus can get going, so it’s not a problem. 

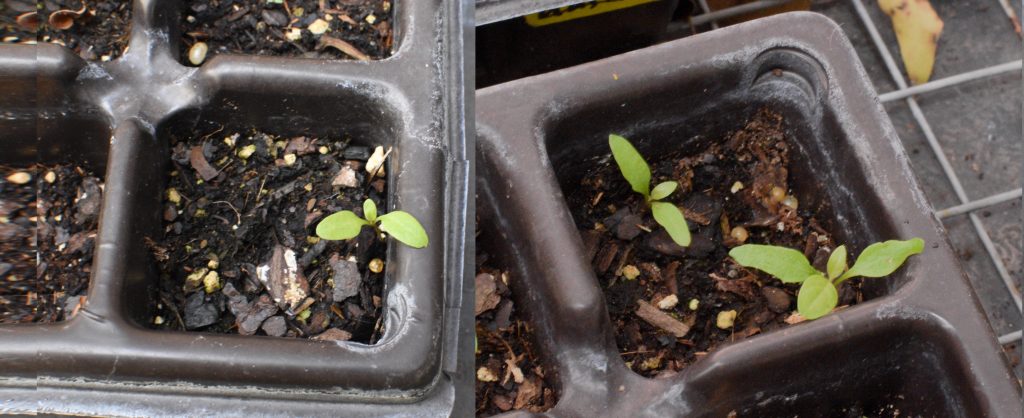
Tomato seedlings in flats (left) and in 6″ planters (right). The true leaves have extended to become branches, from which multiple, multi-lobed leaves grow.

I keep the seedlings indoors overnight, where the temperature is 68–70 °F (20–21 °C), but set them out in the sunshine when the temperature outside is above 50 °F (10 °C).  On days when they can’t get any outside sun, they sit by a window and I turn on my grow light. During the seedling stage is when fungi can become a problem. To deter the growth of fungi, remove the flats from the heating mat and allow the top of the potting mix to dry out, or nearly so, between waterings.

In a couple months the plants will produce small, yellow flowers and set fruit. These are tomatoes from last year (2022).

I’m in USDA Plant Hardiness Zone 8B, so my gardening season is going to start a bit before most gardeners in the US. Keep watching this website for more vegetable gardening information. 

Two Amber Lager Recipes

Most homebrewers start by brewing ales. This is because it is not hard to find a cool room, or put a wet t-shirt over a carboy, and keep a fermenting ale in the proper temperature range. In contrast, for most people, holding 5.0-gallons (19 L) or more of beer at lager fermentation temperatures requires a fridge or freezer and an external thermostat. 

If you’ve decided to take the plunge in lagers, your next choice is what to brew. Obviously, the type of lager beer you enjoy the most should be at the head of the list. For me, any of the amber lagers — including Vienna lagers, Märzens, Octoberfests, American amber lagers, and even rauchbiers — would be on my short list. On a recent episode on James Spencer’s podcast, Basic Brewing Radio, we discussed how to put together an amber lager recipe. In my opinion, the top three requirements for brewing a great amber lager are running an ordered fermentation; using fresh, high-quality ingredients; and, as always, being scrupulous about your cleaning and fermentation. Running an ordered fermentation involves pitching enough healthy yeast into properly aerated wort and holding the fermentation temperature steady. 

On James’s show, we came up with two amber lager recipes that I’m sharing below. James has already brewed the first and a second brewer may try the second. (I’m going to be brewing a raspberry wheat beer from a previous show.) Here are the two recipes. 


Third Man in the Fourth Zone Vienna Lager 

Amber Lager (I), by Chris Colby


DESCRIPTION

This is a relatively dry, well-balanced amber lager. You could call it a Vienna lager, Märzen, or simply an amber lager. 


INGREDIENTS (for 5.0 gallons/19 L) 

Malts (for an OG. of 1.052 and 18 SRM) 

7.5 lb. (3.4 kg) Vienna malt

2.5 lb. (1.1 kg) light Munich (8–10 °L) 

2.0 oz. (57 g) black malt (dehusked preferred)


Hops (for 30 IBU)

2.5 oz. (71 g) Saaz hops (@3.2% AA) 


Yeast (for FG 1.011 and 5.4% ABV) 

lager yeast (your choice, slurry from 1.0-gallon/4 L yeast starter) 


PROCEDURES 

Mash in with 3.5 gallons (13 L) of water at 151 °F (66 °C) for a strike temperature of 140 °F (60 °C). Let mash rest at 140 °F (60 °C) for 15 minutes, then heat mash to 152 °F (67 °C). Stir as you heat. Raise temperature about 2 °F (~1 °C) per minute. Let rest at 152 °F (67 °C) for about 30 minutes, then mash out to 168 °F (76 °C). Recirculate and collect about 6.5 gallons (25 L) of wort. Boil for 90 minutes, to reduce wort volume to 5.0 (19 L) gallons. Add hops for final 60 minutes of the boil. Cool to fermentation temperature (which dependson the strain of yeast you have chosen). Aerate thoroughly and pitch yeast. Ferment until completion, allowing the temperature to rise to 60 °F (16 °C) at the end. After 3 days at 60 °F (16 °C), check to ensure that diacetyl is not detectable. Rack to a “secondary fermenter” or keg and store at refrigerator temperature for 4 weeks. Taste test and begin serving if the beer is no longer “green.” 


Backyard Cookout Amber Lager

Amber Lager (II)


DESCRIPTION

This is a full-bodied amber lager, in the style of many American amber lagers. It’s balanced and “quaffable,” as they say. 


INGREDIENTS (for 5.0 gallons/19 L)

Malts (for an OG. of 1.052 and 23 SRM)

5.0 lb. (2.3 kg) 2-row pale malt or Pilsner malt 

4.0 lb. (1.8 kg) light Munich (8–10 °L) 

6.0 oz. (170 g) crystal 40 °L

3.0 oz. (90 g) crystal 60 °L

2.0 oz. (57 g) black malt (dehusked preferred)


Hops (for 26 IBU) 

any relatively neutral strain of hops for bittering 

(for example  0.54 oz./15 g of Magnum at 13% AA)

0.25 oz. (7 g) any aroma hop without a strong varietal characteristic for aroma 


Yeast (for FG 1.013 and 5.0% ABV)

lager yeast (your choice, slurry from 1.0-gallon/4 L yeast starter) 


PROCEDURES 

Mash in with 3.3 gallons (12 L) of water at 163 °F (73 °C) for a strike temperature of 152 °F (67 °C). Let the mash rest for 45 minutes. Mash out to 168 °F (76 °C). Recirculate and collect about 6.3 gallons (24 L) of wort. Boil for about 75 minutes, to reduce wort volume to 5.0 gallons (19 L). Add bittering hops for final 60 minutes of the boil. Add aroma hops at knockout. Cool to fermentation temperature (which depends on your yeast strain). Aerate thoroughly and pitch yeast. Ferment until completion, allowing the temperature to rise to 60 °F (16 °C) at the end. After 3 days at 60 °F (16 °C), check that diacetyl is gone. Rack to a “secondary fermenter” or keg and store at refrigerator temperature for 4 weeks. Taste test and begin serving if the beer is no longer “green.”

Both of these recipes were formulated by James and I, and were not brewed at the time of our discussion. (They will be soon. And, they’re both very similar to two amber lagers in my recipe book, The HomeBrew Recipe Bible.) For yet another amber lager recipe, see also my Schell’s Firebrick clone. Firebrick is a beer I seek out whenever I’m in the upper midwest. It’s a wonderfully balanced beer, in my opinion.

Early Growth Stages in a Nightshade

The early growth of deadly nightshade (Atropa belladonna) shows some typical features of a plant in the Solanaceae family. The Solanaceae is also called the nightshade family. Other plants in this family include tomatoes, chili peppers, potatoes, eggplant, and tobacco. As a gardener and a biologist, how plants grow interests me. And, with a bit of observation, it is easy to gain some understanding into how a tiny sprout eventually unfolds into a larger adult plant.

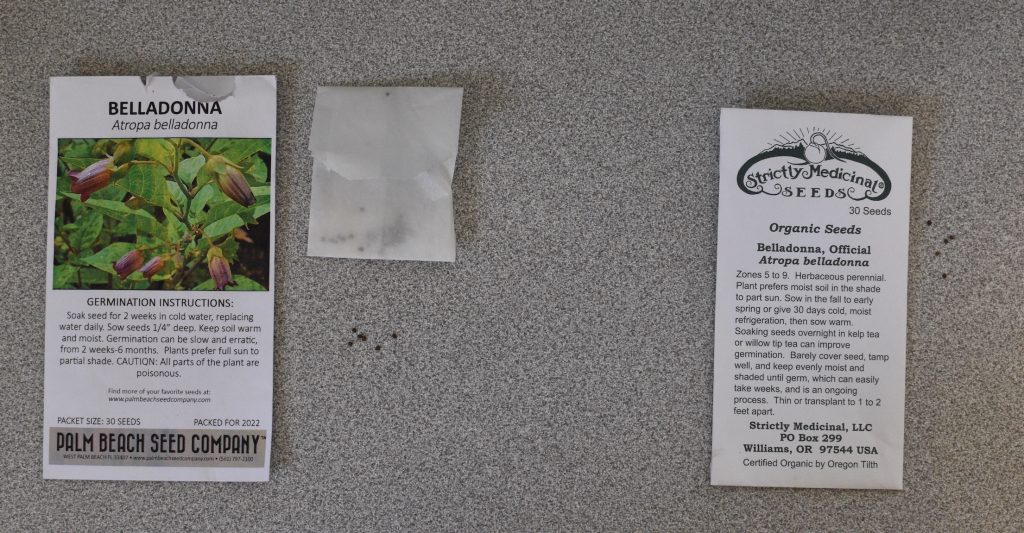
Deadly nightshade seeds from two sources. They germinate better if they are cold conditioned.

In this blog, I will highlight the early growth stages of a variety of plants. These will include common garden vegetables and native perennial wildflowers. Not only is this interesting, but it has a practical value. Most gardening guides show only adult plants, with flowers or hanging fruit, to illustrate an entry on a plant. However, it is helpful for a gardener to be able distinguish the small seedlings of desired plants from weeds and to be able to identify volunteer plants in a garden. In the spring, I will compare early tomato and pepper development to this plant. 

Most vegetable gardeners plant their seeds in the spring. The seeds sprout soon after and the plants flower and bear fruit while it is still warm. However, there are many perennial wildflowers that are best planted in the fall. Some of these will emerge during the winter and will die off when the weather warms up. Deadly nightshade is happy to sprout in cold temperatures. So is larkspur, which typically dies back when other early blooming wildflowers are just starting the bud. Deadly nightshade is notoriously hard to germinate, and how I got my seeds to sprout will be the topic of a separate post. But they are sprouting now, and by looking at the sprouts, you can see how the plant develops through its earliest stages. 

Flowering plants can be divided into dicots and monocots. The “cot” in dicot and monocot refers to the seed leaves, or cotyledons. Dicots have two. Monocots have one. Most common garden vegetables and wildflowers are dicots. Monocots are grassses such as corn, wheat, barley, oats, rice, etc. The cotyledons, along with the stem, are the first structures to appear above the soil when the plant sprouts. If a plant emerges and initially has two “leaves,” it’s a dicot. 

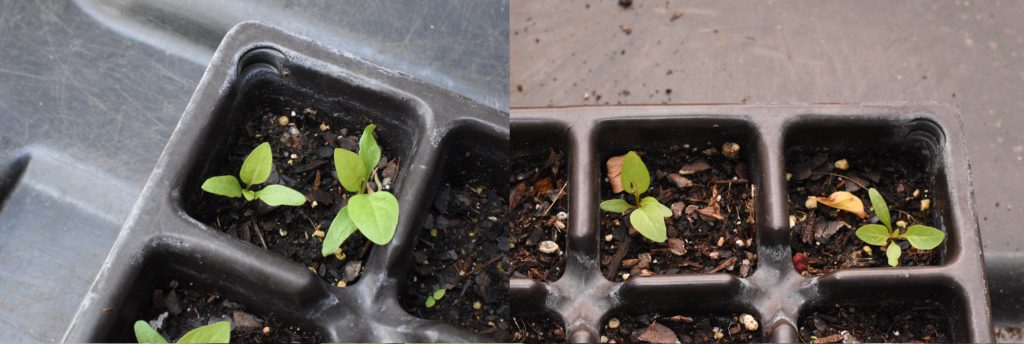
Left: Two seedlings that have just emerged. You can see the seed coats still attached to their cotyledons. Right: Same two a few days later, and a couple other new sprouts.

What happens next depends on the species of plant. In the case of deadly nightshade, the first true leaf emerges by itself. This single-lobed leaf is oriented perpendiciular to the long axis of the cotyledons. Next, the second leaf emerges opposite the first leaf. At the two-leaf stage, the two cotyledons and two leaves form a cross. 

Two seedlings at the first true leaf stage and one with the second leaf emerging.

This is not the only pattern in dicots, however. In some plants, the first two true leaves emerge opposite each other simultaneously. And what comes after that also varies. Some plants quickly elongate their stem and keep producing leaves at regular intervals. Others develop a large number of leaves to form a small mound of vegetation. But for now, here is how deadly nightshade starts its life cycle. More later. 

Seedlings with their second leaves, and one for which the third leaf is just emerging (far right).

Norwegian Holiday Beers

Norwegians take their winter beers seriously. Each year, there are over 300 different brands of juleøl for sale, with just under 200 of them brewed in Scandinavia. Winter and holiday beers are popular in the other Scandinavian countries and in northern Europe, so of course Norway imports many of these international beers as well. The word juleøl is a concatenation of jule — the winter holiday season — and øl, the Norwegain word for beer. Øl is pronounced like “pull” or “hull” in English, without the leading consonant. The whole word sounds like “you’ll ull.” In other words, the “j” is not pronouced as it is in “jitter” or “Jill.”

Norway has some restrictive laws pertaining to the sale of alcohol. Beer is expensive in Norway because the high tax rate on it is high. And discounts on alcohol are prohibited. Additionally, alcohol advertisements are also prohibited in Norway. However, Norway takes their freedom of the press very seriously and every year the Norwegian press prints lists of the best juleøls. So beer lovers have some ideas about what beers to search for. 

To buy juleøl, Norwegians must go to their local Vinmonopolet — the government-run liquor store for anything over 4.7% alcohol by volume (ABV). The word Vinmonopolet translates literally as wine monopoly as they are the only outlets from strong beer, wine, and spirits in Norway. Around Christmas, the usual beer selection will be scaled back, and the shelves filled instead with juleøl. While there, Norwegians may probably also pick up some glogg (mulled wine) or aquavit, the caraway-favored distilled spirit that’s popular year-round in Scandinavia. 

Juleøl is not style of beer in the sense of having to fall within certain guidelines. Any beer available during jule can be a juleøl. However, there are some characteristics most share. Juleøls — juleøler in Norwegian — are usually strong beers, albiet not insanely strong. Beers in the 6–7% ABV range are common, but a few are over 10% ABV. Many are amber or dark brown, although pale versions are not unheard of. Some are spiced although others aren’t. Common descriptors of the best juleøler include malty, dried fruit, and caramel. They are generally not heavily hopped. 

Homebrewers should feel free to make any beer they would enjoy over the winter and call it a juleøl. If you’re looking for some ideas, I was a guest on James Spencer’s podcast, Basic Brewing Radio somewhat recently (October 13). We discussed how to formulate a winter beer. Not specifically a juleøl, but it could be. I did publish a juleøl recipe in Mother Earth News a couple years ago. 

Garlic Experiment

One question many gardeners have is whether you can plant supermarket garlic and have it grow successfully. If you search the web for the answer, you get both yes and no. Some people say, “Sure, just stick it in the ground and it will grow.” And this is tempting since seed garlic is expensive compared to supermarket garlic. Others — and especially those selling seed garlic — will say that supermarket garlic may be treated with growth inhibitors or that it may bring disease to your garden. I decided to conduct an experiment to compare the two. 

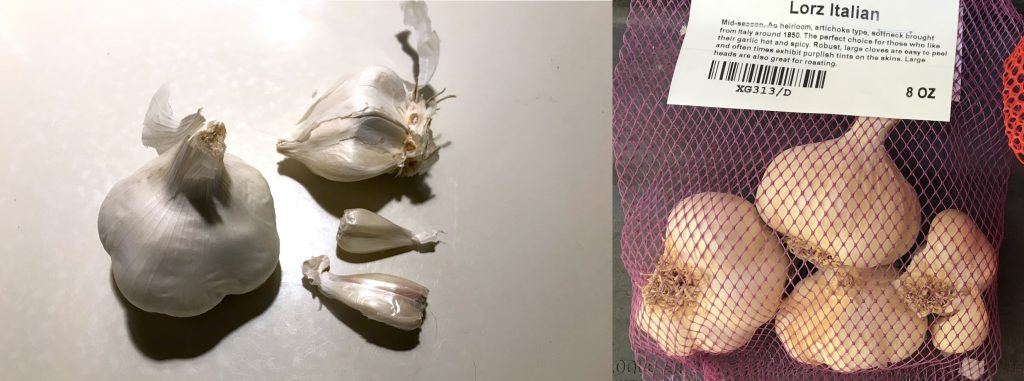
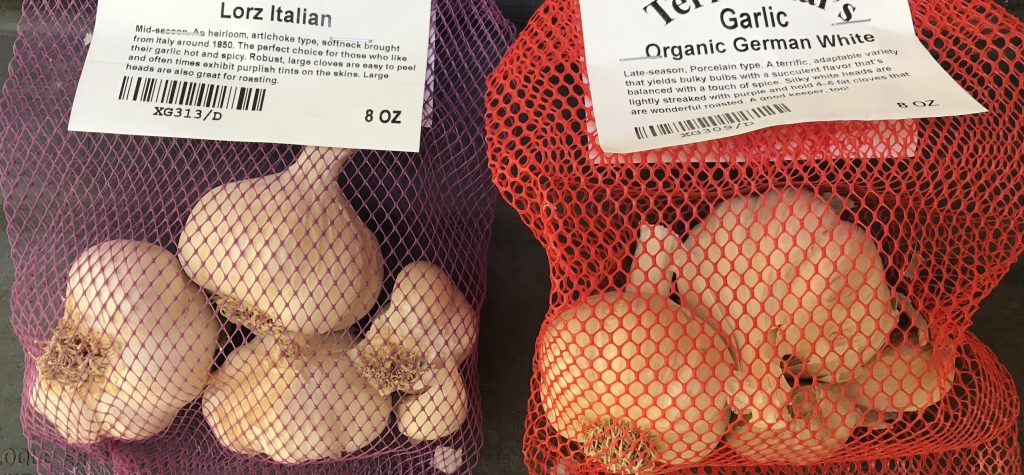
Supermarket garlic (left): It cost less than $0.65 per bulb. Seed garlic (right): It cost about $18.00 for this bag, making it roughly $5.40 per bulb. The sizes of the seed garlic bulbs, and cloves inside, were bigger than the supermarket variety, however.

Garlic is planted in the fall. In my area, they say that mid to late October is the best time to plant. So, my experiment is already up and running. In one of my 50-gallon planters, I planted both supermarket garlic and seed garlic. Both types were softneck garlic, although they are different cultivars as I couldn’t find seed for the supermarket variety. The seed garlic I planted is called Lorz Italian. Sharing the same planter, both types are in the same type of soil, will get the same amount of watering, and the same amount of sun. I planted the garlic cloves in a grid with alternating types. That way, if — for some reason — one section of the planter was more favorable to growing garlic, both types would be growing in it. That’s not likely, but a good experiment is designed to control for all possibilities.

Everything in the experiment was designed to treat both types of garlic the same way. That way, any differences between them should be due to the experimental variable (supermaket or seed), not to differences in how they were raised. I’ll give more “science-y” details about this experiment in a later post. These will include a discussion of sample size, statistics, and whether this experiment has the power to answer the experimental question. I will also discuss limits to the inferences that can be drawn from the data and more. 

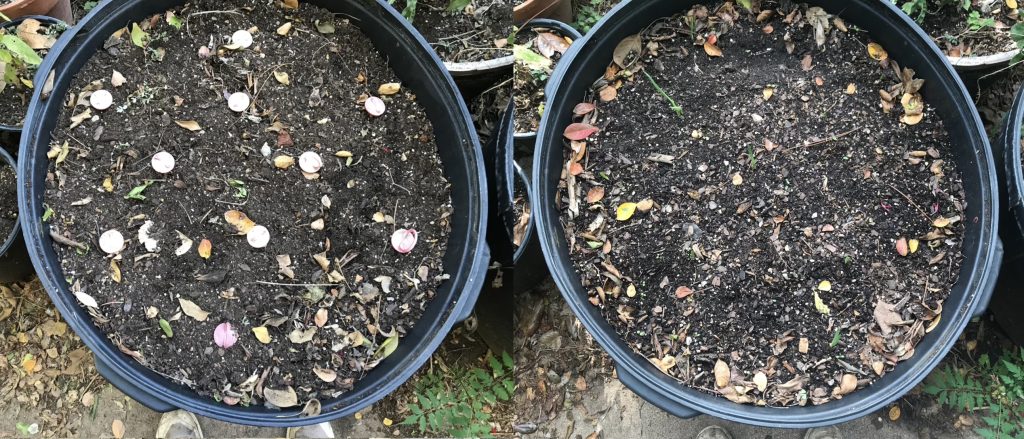
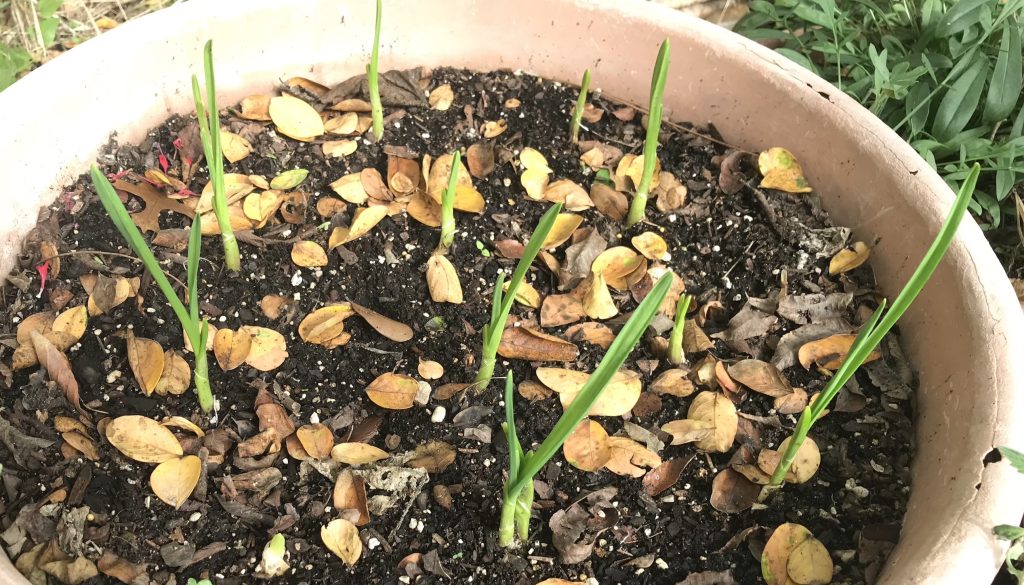
On the left, a picture of the planter after the supermarket garlic was planted, but (immediately) before the seed garlic was. The red markers show where the seed garlic will go. The supermarket garlic is planted to the left or right of the markets, with the spacing being even. The cloves are all separated by 5 inches. On the right, the planter today, with a few sprouts visible.

I planted 10 large, healthy-looking cloves from the supermarket garlic and 10 from the seed garlic. The seed garlic cloves were substantially larger than the supermarket cloves. (I still have some of each type left and will weigh them to get a ballpark difference. I should have done that with the actual cloves I planted, but didn’t think about it until after they were in the ground.) I will assess the germination rate of each type. In the summer, I will give a rating based on how large and healthy the plants look during mid season. I will also reassess at maturity. Most importantly, at harvest time I will weigh the garlic heads to see if one is yielding more than the other. And of course, there will be a taste test. 

I planted both types two weeks ago and they have already started sprouting. (There looks to be a pattern emerging, but I’ll wait until all the data is in before reporting it. For one thing, early sprouting may not be a good sign. Or it might be, I don’t know. However, through the experiment, I have a good chance of finding out.)

Two types of seed garlic — softneck (left) and hardneck (right).

I also have a second garlic experiment running, although this one is not as well-controlled as the first. In a separate planter, I have planted 12 cloves of hardneck garlic, a variety called German White. I want to see how softneck garlic performs vs. hardneck in my neck of the woods. The answer in every garden guide I’ve ever read is that hardneck garlic will do poorly in the south (where I live). But, I’ll find out. 

My hardneck garlic planter. I’ll need to mulch this down before cold weather arrives (if it does).

Cranberry Zinger (Partial Mash) 

Thanksgiving is coming and there’s still time to brew my Cranberry Zinger. The Cranberry Zinger is a dry, fizzy beer with a tart taste and puckering mouthfeel from cranberry relish. The base beer is an American honey wheat beer.

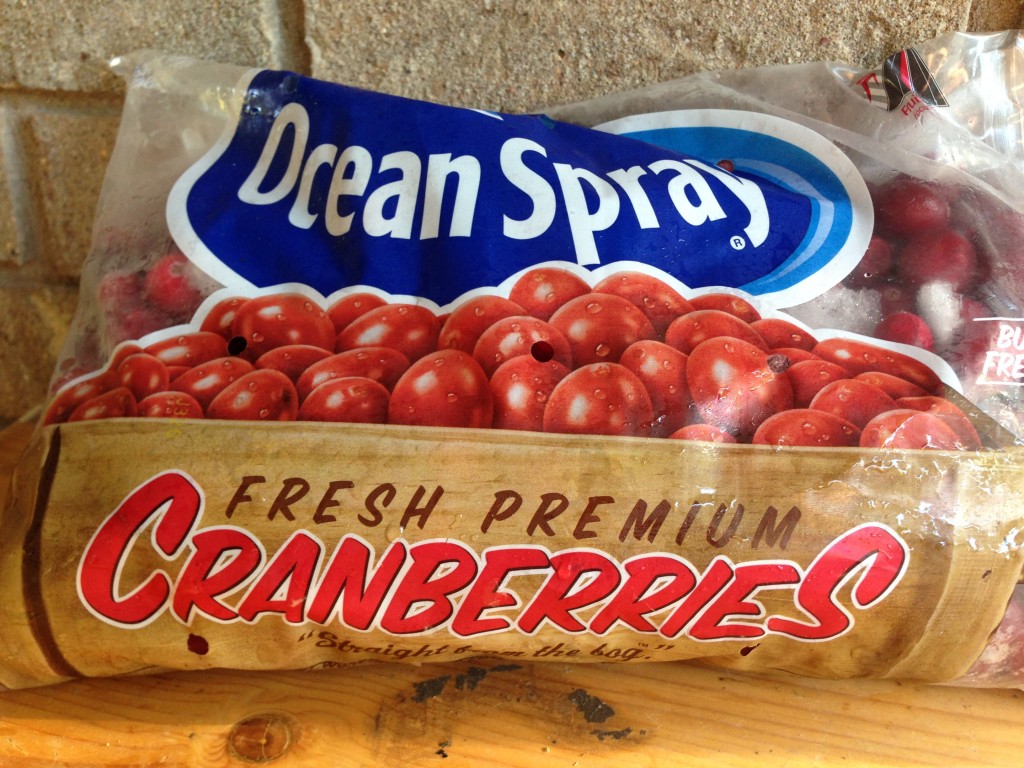
Fresh whole cranberries are what I use.

The interesting part of the beer is the fruit mixture — the standard mixture for cranberry relish as it is usually prepared for Thanksgiving except for the sugar. Cranberries are tart and strongly flavored, with a relatively high amount of tannins. This, combined with the bitterness from the orange pith, gives the beer a slightly bitter, somewhat puckering quality even though the hop bitterness is low. The combined cranberries, oranges, and Granny Smith apples produce a very fruity aroma, which is enhanced by the high degree of carbonation. 

Don’t attempt to sanitize the fruit mixture. It’s not needed. The pH of the beer and relish mix, plus the alcohol in the beer, won’t support the growth of most brewery contaminants. I usually add two packets of dried yeast to ferment the 5.0 gallons (19 L) of beer, but that’s not strictly required. I like the base beer to ferment quickly and end up maximally dry, though, so I add the second packet to help with this.

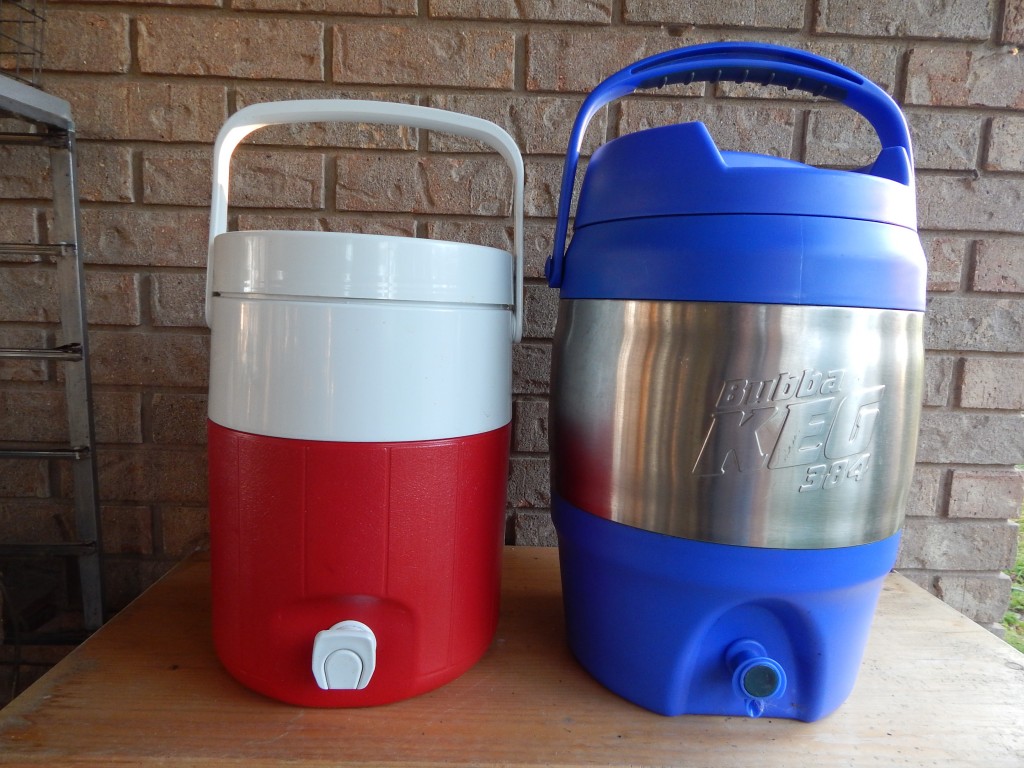
A 2-gallon (left) or 3-gallon (right) beverage cooler can hold up to 4.0 lbs. or 6.0 lbs. of grain, respectively. This can yield 2.6 gallons or 3.9 gallons of wort at SG 1.044.

This beer is extremely straightforward to make and turns out great every time. It’s one of my most foolproof recipes. Everyone who has made it says it turned out great and was a crowd-pleaser.

Cranberry Zinger

by Chris Colby

Partial mash; English units


DESCRIPTION

This my cranberry beer that I think goes well with Thanksgiving. It is a honey wheat beer is flavored with cranberry relish — cranberries, Granny Smith apples and Navel oranges (zest, rind, pulp and all). The beer is fairly dry and somewhat tart due to the cranberries. The orange pith lends some bitterness and the cranberry skins give the beer a dose of astringency that keeps the beer from seeming like alcoholic fruit punch.


INGREDIENTS (for 5 gallons)

Water

carbon filtered tap water, preferably low in bicarbonate ions (<50 ppm) 


Fermentables (for an OG of 1.045, not including sugars from fruit, and an SRM of 4)

2.0 lbs. Pilsner malt

2.0 lbs. wheat malt 

1.0 lbs. wheat dried malt extract

2.0 lbs. honey (your choice of variety), at knockout


Hops (14 IBUs total)

Willamette hops (14 IBUs)

1 oz. (of 5% alpha acids), boiled for 30 minutes

Fruit (makes the “virtual OG” roughly 1.046)

4.0 lbs. cranberries (whole, preferably not frozen)

2 medium Navel oranges

2 medium Granny Smith apples


Yeast (for an FG of 1.007 and 4.9% ABV)

22 g (two 11-g sachets) Fermentis Safale US-05 dried ale yeast


Other

1/4 tsp. yeast nutrients (15 mins) 

1/2 tsp. pectic enzyme (in secondary fermenter) 

6.0 oz. cups corn sugar (for priming to 2.8 volumes of CO2)


PROCEDURE

Line a 2-gallon beverage cooler with a large nylon steeping bag and place crushed malts in it. Heat 1.5 gallons of water to 164 °F and pour into grains, stirring as you proceed. Place lid on cooler and drape with a heavy towel, to retain heat. Let grains mash undisturbed for 40 minutes. Then, lift lid and stir mash and let it mash for another 5 minutes. Recirculate the wort by drawing off 1 or two cups at a time and returning the liquid to the top of the grain bed. Heat 2.0 gallons of water to 180 °F. (Yes, this is hotter than most homebrew sources would recommend. Trust me. Or don’t.) Draw of 1–2 cups of wort and place in brewpot. Then, add that same volume of hot water to the top of the grain bed. Repeat until you have collected 2.5 gallons of wort. Begin heating as soon as the first few cups of wort are in the brewpot. Ideally, the wort should come to a boil right as you are adding the last runnings of the wort to the brewpot. Boil for 45 minutes. Add boiling water, if needed to prevent boil volume from droping below 2.0 gallons. With 30 minutes left in the boil, add the hops. With 15 minutes left in the boil, add the Irish moss. With 5 minutes left in the boil, stir in the dried malt extract. At the very end of the boil, stir in the honey and let the wort sit for 5 minutes before cooling. After the boil, chill wort with wort chiller or by placing the brewpot in a sink of tub of cold water. Drain hot water and replace with cold water every 5 minutes. Add ice after the first 3 water changes. Transfer wort to a fermenter, aerate, and pitch the yeast. Ferment at 68–70 °F. When fermentation is complete, make cranberry relish. Do this by rinsing the fruit in water, then combining cranberries, apples (minus the cores) and whole oranges (rind and all) in a food processor. Blend to the consistency of cranberry relish, Place fruit in sanitized bucket fermenter and rack beer onto it. (You can put the fruit in a nylon steeping bag to keep it contained.) Add pectic enzyme. Let fruit contact the beer for 7–10 days, then rack beer to bottles or keg. Carbonate to 2.8 volumes of CO2.


Cranberry Zinger

by Chris Colby

Partial Mash; metric units


INGREDIENTS (for 19 L)

Water

carbon filtered tap water, preferably low in bicarbonate ions (<50 ppm)


Fermentables (for an OG of 1.045, not including sugars from fruit, and an SRM of 4)

0.91 kg Pilsner malt 

0.91 kg wheat malt

0.45 kg wheat dried malt extract

910 g honey (your choice of variety), at knockout


Hops (14 IBUs total)

Willamette hops (14 IBUs)

28 g (of 5% alpha acids), boiled for 30 minutes

Fruit (makes the “virtual OG” roughly 1.046)

1.8 kg cranberries (whole, preferably not frozen)

2 medium Navel oranges

2 medium Granny Smith apples


Yeast (for an FG of 1.007 and 4.9% ABV)

22 g (two 11-g sachets) Fermentis Safale US-05 dried ale yeast


Other

1/4 tsp. yeast nutrients (15 mins) 

1/2 tsp. pectic enzyme (in secondary fermenter) 

170 g cups corn sugar (for priming to 2.8 volumes of CO2)


PROCEDURE

Line a 8-L beverage cooler with a large nylon steeping bag and place crushed malts in it. Heat 5.7 L of water to 73 °C and pour into grains, stirring as you proceed. Place lid on cooler and drape with a heavy towel, to retain heat. Let grains mash undisturbed for 40 minutes. Then, lift lid and stir mash and let it mash for another 5 minutes. Recirculate the wort by drawing off 1 or two cups at a time and returning the liquid to the top of the grain bed. Heat 7.6 L of water to 82 °C (Yes, this is hotter than most homebrew sources would recommend. Trust me. Or don’t.) Draw of 1–2 cups of wort and place in brewpot. Then, add that same volume of hot water to the top of the grain bed. Repeat until you have collected 9.5 L of wort. Begin heating as soon as the first few cups of wort are in the brewpot. Ideally, the wort should come to a boil right as you are adding the last runnings of the wort to the brewpot. Boil for 45 minutes. Add boiling water, if needed to prevent boil volume from droping below 7.6 L. With 30 minutes left in the boil, add the hops. With 15 minutes left in the boil, add the Irish moss. With 5 minutes left in the boil, stir in the dried malt extract. At the very end of the boil, stir in the honey and let the wort sit for 5 minutes before cooling. After the boil, chill wort with wort chiller or by placing the brewpot in a sink of tub of cold water. Drain hot water and replace with cold water every 5 minutes. Add ice after the first 3 water changes. Transfer wort to a fermenter, aerate, and pitch the yeast. Ferment at 20–21 °C. When fermentation is complete, make cranberry relish. Do this by rinsing the fruit in water, then combining cranberries, apples (minus the cores) and whole oranges (rind and all) in a food processor. Blend to the consistency of cranberry relish, Place fruit in sanitized bucket fermenter and rack beer onto it. (You can put the fruit in a nylon steeping bag to keep it contained.) Add pectic enzyme. Let fruit contact the beer for 7–10 days, then rack beer to bottles or keg. Carbonate to 2.8 volumes of CO2.

Cold Conditioning Native Seeds (I)

Fresh garden vegetable seed will generally germinate promptly and evenly after planting. For example, if you plant 100 green bean seeds in the correct soil temperature range and water them adequately, they will begin to sprout after about 7–10 days. And, on average, 98 or more of them will emerge over the course of the next few days. The same goes for most commercially cultivated annual flower seeds. If you try that with many native plant seeds, the result will be much different. 

In the best case scenario, most of your native seeds will start to sprout relatively soon. But in some cases, early germination may be sparse and the rest will appear slowly and unevenly. Some seeds may even lay dormant until the next year. By staggering germination times, native plants avoid putting all their eggs in one basket. Their seeds will sprout at different times and hopefully at one point the conditions will be just right for them to flourish. 

In the worst case scenario, none of your seeds — or very few of them — will germinate. Many native plants additionally require some sort of trigger to get them to germinate. One of the most common of these requirements is a period of low temperatures. (Other seeds require alternating periods of hot and cold or other treatments. In general, a treatment meant to increase the germination rate of seeds is called stratification.)  Milkweeds are one example of seeds that benefit from being exposed to cold temperatures before planting, but this very common for native perennial seeds. 

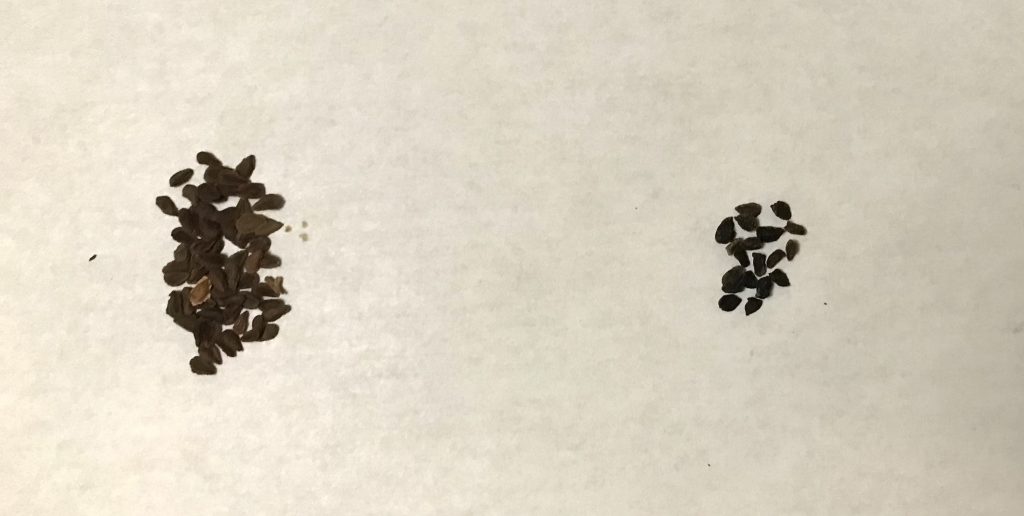
Milkweed seeds (left) and monkshood seeds (right) are two of the many native perennials that benefit from cold conditioning.

In the wild, of course, the cold temperatures are supplied by winter. Seeds that form during the spring, summer, and fall are spread by the wind or by animals. Some of them end up in a location that is suitable for germination. During their time in (or on) the ground, precipation wets their seed coats and germination inhibitors are washed away. Then, in the winter, a period of cold temperatures primes the seeds for germination. When warmer spring temperatures arrive, the seeds sprout and the plants start growing. 

As a gardener, you can cold condition your native seeds in a couple of ways. Obviously, you can plant them outdoors before your first frost and simply wait for spring. To do this, you should clear the planting location of any existing plants. Unless you experience a drought, however, you don’t need to tend to the seeds over the winter. However, it may help to add some mulch over the area and label it with a stake so you remember what sprouts you are expecting in the spring.

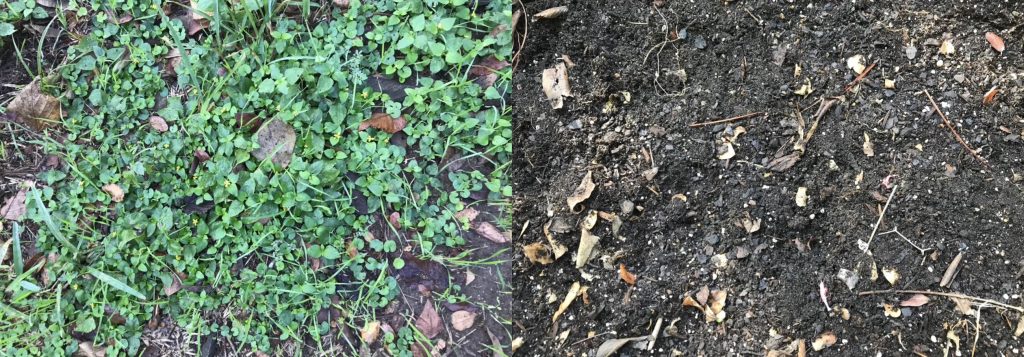
The ground on the left needs to be cleared before seeds are planted. If not, it will be hard to tell the sprouts of desired plants from the existing plants growing there. Bare ground (right) can be mulched to keep the soil from drying out.

You can also cold condition seeds in your house to prepare for early spring planting. There are several ways to do this, and I will cover that in a later post.

5 Winemaking Rules for Making Great Homemade Wine

Making wine at home is a relatively inexpensive, stress-relieving hobby (most of the time!) that everyone should try. If you love wine, it’s a great way to save money on your hobby and a chance to get creative and make the wine you’ve always dreamt of! You can be obsessively detailed with every aspect if you want (and commercial winemakers are) but you really don’t need to be to enjoy good wine at the end. In this article, I explain five simple rules that should be followed on your winemaking journey.

1. Be Obsessively Clean

Wine spoilage is a real threat and one that you can help avoid by keeping high standards when it comes to wine hygiene. From the grape crush to bottling, you need to keep your wits about you and stay clean at all times. That means any winemaking tools or apparatus that come into contact with your wine need to be sanitized. That means your hands and arms and your arms too! Pretend you’re the surgeon and the wine is your patient! So what does this mean? Give your equipment a brush with hot water first to remove dirt and grime first. 

Once visible dirt and grime have been removed you need to use an approved sanitizing agent. A combination of dilute metabisulfite and citric acid is commonly used but I recommend avoiding using sulfites at every clean as you need to thoroughly rinse it off with sanitary (boiled) water to prevent residual sulfites from affecting the balance of your wine. I recommend using a solution like StarSan (commonly used in brewing) which is an acid-based biodegradable sanitizer. Don’t use anything too abrasive to clean with as it will scratch your equipment and provide easy hiding places for bacteria. You should clean equipment as soon as it’s been used to prevent dirt and grime from binding to your equipment.

2. Use The Right Yeast

There are many different types of yeast available for use in winemaking. Be sure to choose a yeast that is suitable for the type of wine you are making. Different yeast will produce different flavors in your wine, and to a large extent will influence the sensory qualities of your wine. Furthermore, using the right yeast will reduce the likelihood of there being problems with the fermentation. When choosing a wine yeast you want to match it to the grape varietal being used. The yeast will complement the specific properties of the grape and allow it to express its maximum sensory potential. You should also consider the alcohol content of the wine you wish to make. Some strains of alcohol have a lower alcohol tolerance and you may find the fermentation becomes stuck because the conditions become unsuitable for them.

3. Monitor Your Fermentation Temperature 

Fermentation is a crucial step in winemaking, and the temperature of your fermenting wine is very important. Too high of a fermentation temperature can produce off-flavors in your wine, while too low of a temperature can slow down or stop fermentation altogether. Be sure to monitor the temperature of your fermenting wine carefully and adjust as needed to keep it within the ideal range for the type of yeast you are using. As well as keeping track of the temperature, don’t forget to chart the progress of the fermentation with your hydrometer too. You can read more about hydrometers in winemaking with Tim Edison’s guide at Wine Turtle.

4. Don’t Stir Too Much 

With red wine, stirring is important in the first 24 hours or so because it helps the yeast to do its job by oxygenating the must (the crushed grapes). However, you want to limit how much you interfere with your wine must once fermentation is in full flow. Punching down the cap with red wine (the floating pulp) regularly is really important to stop bacteria from growing on it, but it doesn’t need much of a stir.

With white wine, a gentle stir every 24 hours during fermentation should suffice. The reason for this is to release the volatile sulfur compounds that are created. One of these compounds is hydrogen sulfide which can make your wine smell like rotten eggs!

5. Age Your Wine Properly 

Your wine will benefit massively from some aging. This is often the hardest part because it takes some patience and self-control not to drink it. However, you’ll thank yourself in the long run. Aging the wine allows flavors and aromas to develop and mature. It rounds off the sharp, abrasive notes and helps round off the tannins too.

After being bottled your homemade wine needs at least four weeks to age but to be honest you should age it for a lot longer. I’d be more inclined to age red wine for at least 6 months. Whites, on the other hand, don’t benefit so much from age and can be drunk while young. Just make sure you have a place that’s reasonably cool and dark to store your bottles.

Above all remember to have fun! There’s an awesome winemaking community out there full of great people who are more than willing to help out beginners with all the questions we all have. Make sure to set up a profile on one of the many online forums or join a local group in your area. It’ll make the process all the easier and more enjoyable.

[This article is a paid guest column and as such is labelled as an advertisement.]