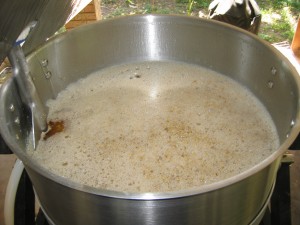
A mash/lauter tun right after mashing in. One option you have is to add the water and grains simultaneously (or nearly so).
Homebrewers sometimes debate whether it’s best to stir the crushed grains into your strike water when mashing in, or vice versa. However, there’s a third option — add them at the same time. The biggest advantage of this method is that you can monitor your mash temperature as you build your grain bed. If you want to hit your mash temperature exactly, this method of mashing in works well. Plus, it’s easy to do and requires no extra equipment.
In the not too distant past of commercial brewing, many breweries used a Steele’s Masher to mash in. (Some still do, although it’s less common these days.) A Steele’s Masher is essentially a big auger that delivers crushed grain to the mash tun. Hot water is added to the grain a couple turns of the screw before it falls into the mash tun and thus the mash tun is filled with hydrated grist, not water first then grains or vice versa.
You can do something very similar to this at home with two “scoops” of the same size. I use plastic 60-oz. beer pitchers.
After adding the foundation water to cover my false bottom, I add one scoop of strike water, then I use the second pitcher and add one scoop of crushed grains to the vessel. I give the mix one quick stir and repeat. I use separate pitchers so the grain doesn’t stick to the wet pitcher, even though this wouldn’t really matter much.
Because one beer pitcher holds 2.0 quarts (1.9 L) of water or roughly 2 pounds (~0.91 kg) of crushed malt, the resulting mash thickness is roughly 1.0 quart of water per pound of grain (2.1 L/kg) — a little thick. To get the right mash thickness, you could simply add 2 scoops of water every third or fourth round for a mash thickness between roughly 1.33 qts./lb. (2.8 L/kg) and 1.25 quarts/lb. (2.6 L/kg). I just scoop a slightly smaller volume of grain each time, compared to my water volume and eyeball the mash thickness as I go. You may need to adjust this ratio depending on how finely you crush the malt and how tightly you pack your grain scoops. Note that the size of your two scoops doesn’t matter, as long as they are the same volume.
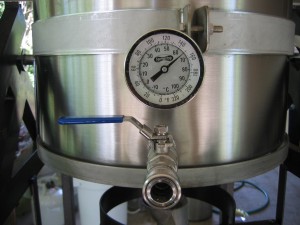
As you mash in, the temperature of the growing grain slurry is going to be close to your mash temperature. The grain bed will lose some heat to your mash/lauter tun, but not much. So, as you fill the mash tun, you can monitor the temperature and make any adjustments in strike water temperature as you go. (If you keep a couple gallons of boiling water handy and also a couple gallons of cool tap water, you can make small adjustments on the fly.) I wait until I’m about two-thirds mashed in before I start checking. At this point, I should be within a degree or two of my target temperature.
How much heat your mash vessel absorbs and how long it takes to do so is something you will need to learn by trial and error if you want to hit your target mash temperature on the dot.
You do not need to thoroughly stir the mash after each round of water and grain addition. I give the mash one quick stir each round with the idea that I can always do any “extra” stirring once I’m fully mashed in. In practice, I rarely have “malt balls” form when I mash in this way.
Although it takes slightly longer to mash in this way if you are brewing alone, this method works extremely well if you have one or more brewing partners. If you have one brewer adding water, one adding grain and one stirring, you can mash in very rapidly.
An added bonus of using this method is that the temperature of your grain bed is (at least initially) very uniform.
Every method of mashing in has it pros and cons. I’m not claiming this is the best way to mash in for every homebrewing situation. I will say that it works well for me on my system and it always pays to have options for every procedure in homebrewing. If hitting your mash temperature squarely and having a grain bed at a uniform temperature interests you, give this method a try.


That is an interesting idea. I hadn’t thought of doing that. I can see the benefit of being able to see your mash temp as you build it. When I run all my strike water into my tun, then add all my grain, it’s hard to adjust temperatures. I usually either end up a few degrees high or a few degrees low(usually low). Then it’s hard to figure out whether it’s because my thermometer is in a hot or cold spot or if it’s uniform enough to believe.
I’ll have to try this soon. Thanks for the idea.