Archives for July 2013

Wort Chilling and The Danger Zone

When chilling your wort after boiling, there is a “danger zone” to be aware of — a range of temperatures that support the rapid growth of microorganisms (wort spoilers) in your chilling wort. The high end of the “danger zone” is the temperature at which wort-spoiling bacteria and wild yeasts can survive in wort. The low end is the temperature at which these “bugs” can survive and still reproduce rapidly. Above the high end, heat kills the contaminating microorganisms. Below the low end, they can still survive and reproduce, but are slowed somewhat by cooler temperatures. The range can be stated as 160–80 °F (71–27 °C), but these numbers are just estimates. There are countless numbers of bacteria species and it’s always possible that some wort spoilers could survive above 160 °F (71 °C) and the value of 80 °F (27 °C) hinges on how you define “rapid.”
IMG_2960

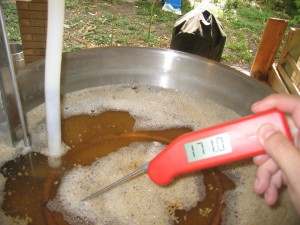
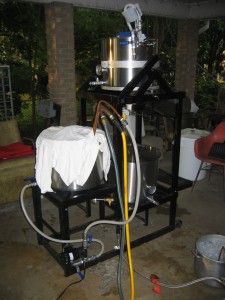
While chilling with my immersion chiller, I cover the kettle to minimize the amount of airborne contaminants settling in the wort. One possible drawback is condensation dripping back into the wort, but I have not encountered elevated DMS levels when chilling this way.

Whatever the boundaries, the idea is sound — there is a range of wort temperatures that support the rapid growth of contaminants to the extent that they can cause problems in your beer. Knowing this, there are some steps that homebrewers should take to ensure a higher level of wort sanitation.
[Read more…]

Wet T-shirt Cooling In Depth

During the summer months, one thing many homebrewers struggle with is keeping fermentations cool. One common method of cooling is the wet T-shirt method. This is a simple, but effective, method of cooling carboys. As someone who has used this method extensively (even after getting a chest freezer), I thought I’d share a few tips.

IMG_2167

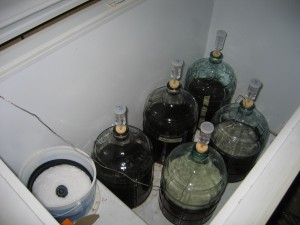
Sometimes your chest freezer is full and you need to use another method of cooling. (And sometimes, you discover that you can’t find any of the photos you’ve taken over the years of carboys with wet T-shirts on them.)

The basic idea of the wet T-shirt method is to put a wet T-shirt over a carboy, and let the heat loss from evaporation cool the carboy and it’s contents. For continual cooling, the carboy can be placed in a container with water at the bottom, so water wicks up the T-shirt as it evaporates. Those large, 100-qt. (95-L) picnic coolers will hold two 6.5-gallon (26-L) carboys. Brewers also use trashcans for this.

[Read more…]

Patrick Henry Pale Ale

496px-Patrick_henry

Somebody get this guy an Anchor Liberty, quick!

With July 4th just two days behind us, I decided to post my “patriotic” pale ale recipe today. This is an American-style pale ale recipe I have been working on since I first started brewing back in 1991. It’s designed to to be nice and hoppy (although not such that it rivals American IPAs or double IPAs), showcasing the citrusy character of American hops. There are four hop additions in the kettle, plus it is dry hopped, so you get plenty of hop flavor and aroma along with the bitterness (44 IBU total). However, it’s also restrained enough (at 5.3% ABV) that it could almost pass as a session beer. The biggest keys to having this recipe turn out well is to use fresh hops with great aroma and pitching the right amount of yeast (see the yeast starter suggestion in the recipe).

There are four versions of this recipe below, two all-grain recipes (one using  English units, the other using metric units) and two malt extract adaptations (English and metric). The extract recipes call for some base malt to be steeped along with specialty grains, improving the aroma of this beer compared to how extract pale ales are usually formulated.

[Read more…]

What Temperature Should Your Sparge Water Be?

How hot should your sparge water be? You would think that this information could be dispensed with a single number, but at the homebrew scale, it’s slightly more complicated than that.

IMG_2956

Your sparge water should be heated so that your grain bed remains at 168–170 °F (76–77 °C). A little over in the early stages of sparging doesn’t hurt.

In all-grain brewing, after the grains are mashed, the wort is run off to the kettle. To ensure that as much of the sugar is recovered from the grain bed as possible, it is rinsed with hot water. This water is called sparge water. Sparge water is heated because hot water dissolves sugar more effectively than cool water. However, if the sparge water is too hot, it will dissolve not only sugars, but also tannins from the grain husks. A small amount of tannins are present in any beer. However, in excess, these tannins cause an astringent mouthfeel to beer and are unwanted.

When sparging is discussed in the homebrewing literature, the appropriate temperature of sparge water is invariably given as 168–170 °F (76–77 °C). This is also the value seen in the professional literature. In a commercial brewery, if the temperature of the grain bed is over 168–170 °F (76–77 °C) at the end of wort collection, there will be too many tannins in the wort.

So in one sense, 168–170 °F (76–77 °C) is the correct answer. From a practical standpoint, however, it pays to understand what is going on in your home brewery when interpreting this number.

[Read more…]

Barley Legal Aeration Experiment

Proper aeration at the beginning of fermentation is important in producing good beer. To simplify things, yeast need an adequate amount of oxygen to ensure a healthy growth phase before they get to work turning sugars into alcohol and CO2.

BarleyLegalHomebrewers differ on the methods they use in aerating their worts. Some prefer a simple approach of shaking the fermenter, while others employ more sophisticated gadgetry. But, which one is best?

Members of the Barley Legal homebrew club from Maple Shade, New Jersey, took it upon themselves to conduct an experiment comparing several aeration methods against each other. The results of their experiment were recorded for an episode of Basic Brewing Radio, which can be heard here. Spoiler alert! The results of the experiment are discussed below. For a more detailed look at the results and to hear the reactions of the participants as the experiment was being evaluated, listen to the show.

[Read more…]

5 Steps to Becoming a Terrible Brewer

gold-number-5

The path to terrible brewing starts here.

Do you wish you were a terrible brewer? Do you want to keep all your beer to yourself because nobody else will drink it? Do you want to be able to walk around freely, not emcumbered by clunky brewing medals? Well, you’ve come to the right place for advice. Here, for the first time ever, are the top 5 steps that will ensure that you — yes, you — can be a terrible brewer.

5.) Ignore Cleaning and Sanitation

Cleaning is time consuming and dull. So is sanitation. A truly terrible brewer isn’t going to be cowed by all those “experts” who say that your equipment needs to be spotless to brew good beer. If the previous beer tasted fine, don’t worry about cleaning the keg, just refill it. And if they meant for you to actually clean the insides of carboys, someone would have invented a carboy brush by now, now wouldn’t they? Just rinse it out. Terrible brewers don’t have time for this menial stuff.

[Read more…]

Starchy Adjuncts and Sweet Potato ESB

Most brewers are aware that corn or rice is used as a starchy adjunct in some beers, especially American-style Pilsners. However, these aren’t the only starchy adjuncts that can be used to brew beer.

NCI5_POTATO

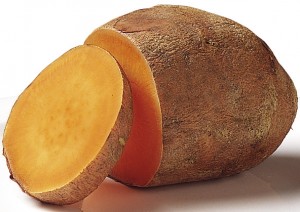
The sweet potato (_Ipomoea batatus_) can be used as a starchy adjunct in brewing.

One interesting beer I have brewed a few times is my sweet potato ESB. (See the recipe below the fold.) Sweet potatoes (Ipomoea batatas) are root tubers — as opposed to potatoes (Solanum tuberosum), which are stem tubers — that are roughly 80% water, with most of the rest of the weight being starch. They contain about 4% protein. At 80% water, you can figure that 5 lbs. (2.3 kg) of sweet potato will yield an extract weight roughly equal to 1.0 lb. of malted barley.

[Read more…]

Why Make Wine Kits?

IMG_1291

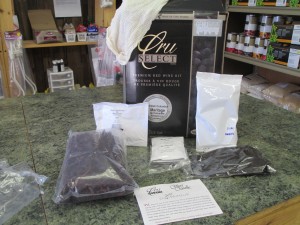
A modern premium wine kit, containing a bag of slightly concentrated grape juice (in the box) and all the additives in individual containers. This kit also contains grape skins which the winemaker soaks (macerates, in winemaking lingo) during the fermentation.

Article and photos by Rich Weaver

Imagine going to your favorite wine shop and paying $20 for your treasured British Columbia Meritage. You pour the wine and take in its aromas of vanilla, chocolate, and leather. You swirl the wine over your tongue and detect flavors of plum and black currants. Now, what if you could make that same wine for $5 a bottle?


Why Make Wine From Wine Kits?

There are several reasons why to make wine from wine kits.  One reason is that you love wine and want a cellar with a nice selection of wine without breaking the bank. The equipment needed to make wine from a kit runs in the $100 to $200 range. And if you’re a homebrewer, you probably have most of it anyway. From there, you can always purchase more carboys to increase your capacity to make more wine to meet demand. Kits themselves vary from “budget” kits, starting at around $60, to premium kits that cost up to around $200. A kit makes 6 gallons (23 L) and yields 30 bottles of wine, so your wine will actually cost around $3 to $7, depending.

[Read more…]

The Easy Way To Hit The Proper Boil pH

IMG_2507

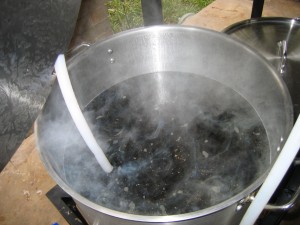
This wort is coming to a boil. Already you can see a small amount of break material has formed.

When most homebrewers consider pH in brewing, they think about achieving the proper mash pH. However, hitting the proper boil pH (of 5.1–5.2) is also important. Having wort in the right pH range at the end of the boil has a few benefits, most notably better hot break production. As wort pH decreases, there is also less color pickup in the boil and hop bitterness becomes more pleasing, although hop utilization decreases.

Sometimes (perhaps most times), having an ideal mash pH of 5.2–5.6 will ensure that your boil pH drops into the proper range without any intervention by the brewer. However, this is not guaranteed. Two different unboiled worts can start at the same pH, but end up at different post-boil pH levels, even if they are boiled for the same time and at the same intensity. Most often, if the boil pH is out of range, it is too high.

Fortunately, there is an easy way to check on your boil pH and adjust it — all without requiring a pH meter or anything you don’t likely already have in your brewery.

[Read more…]

Fully Legal!

Outlaw Homebrew Competition

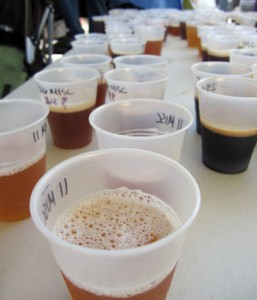
Beers at the 2011 Outlaw Homebrew Competition in Hattiesburg, Mississippi

As of today, it’s officially legal to homebrew in all 50 of the United States. Mississippi’s governor signed legislation legalizing brewing at home back in March, and the law went into effect today. Alabama was the other holdout for legalization this year until its governor signed legislation in May, which took effect immediately.

Many homebrewers say they’d brew whether it were legal or not. Regardless, legalization is important. Legalization is important because homebrew shops don’t have to worry about getting raided, with their equipment — and even books — confiscated. Brewers can brew out in the open without concern that their neighbors will report them to the police. Finally, and perhaps most importantly, legal recognition is another step in helping our communities understand that homebrewing is not equivalent to making meth or bathtub gin.

Cheers to all of the people who have worked so tirelessly over the past few years to make our favorite hobby legal across the country and to modify laws in states where brewing was legal, but restricted. Fire up those kettles and celebrate Independence Day and brewing freedom!